Community and Engagement
Communicating with your students in D2L is common across the University and especially vital for successful online courses. Through discussion forums and one-on-one conversations, developing community provides avenues for learning beyond the classroom.
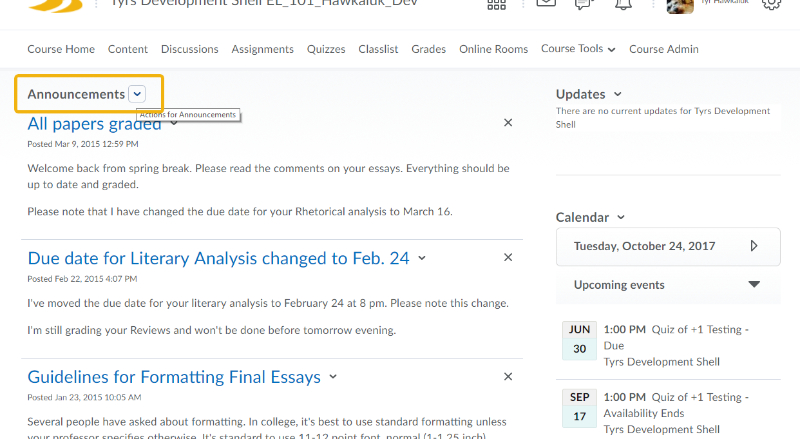
Creating Announcements
Overview
For online instructors, the Announcements tool is an invaluable tool to communicate weekly game plans, remind students of upcoming due dates, and other time-sensitive information. More and more classroom-based courses are relying on the Announcements tool for similar purposes. Students with D2L Pulse on their smartphones will receive immediate notifications. From a completion and satisfaction standpoint, such notifications can sometimes be the difference-maker in in a busy life.
Step-by-Step
- In your course in D2L, click the Announcements arrow button and select New Announcement.
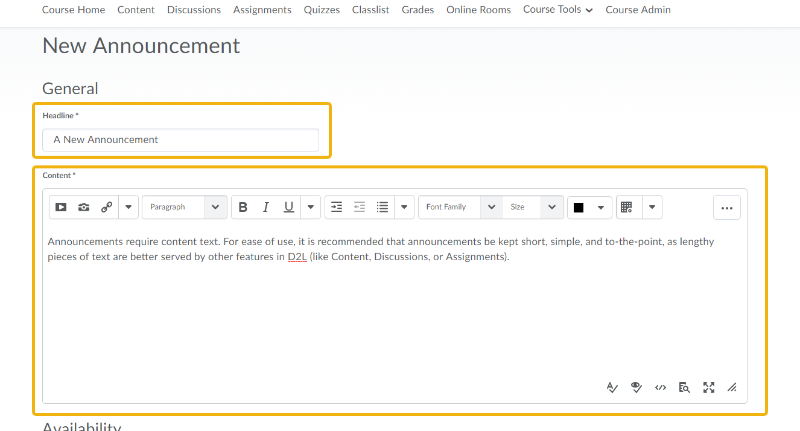
- On the New Announcement page, enter your Headline and the Content of your announcement.
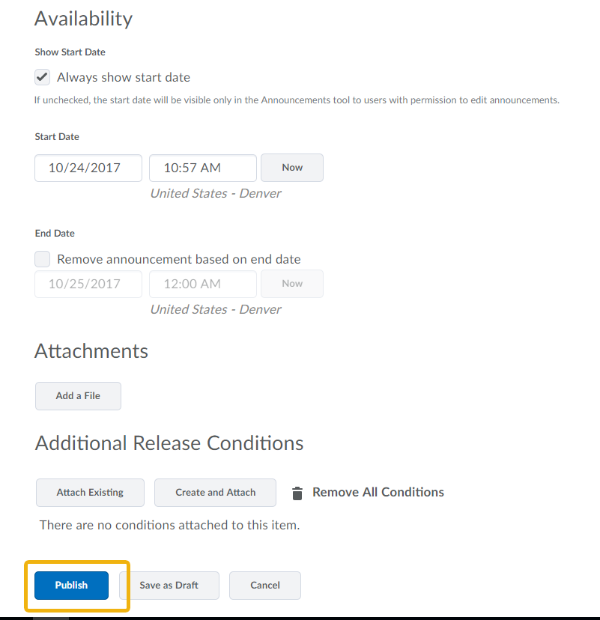
- Below the description, you can set announcement availability. By default, the announcement is set to appear as soon as you hit publish, as shown in the image. You can also attach a file and create a release condition such as one where only certain students see the announcement.
- When finished, you can Publish the announcement, save it as a draft to finish later, or cancel it entirely.
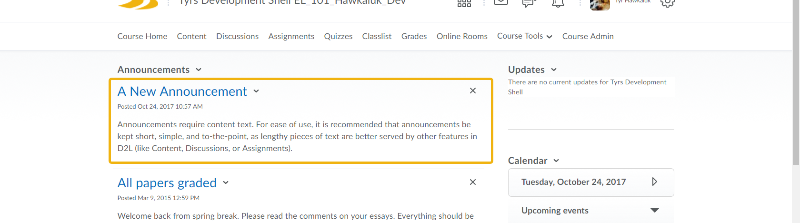
If published, your announcement will appear at the top of your announcement list on the course home page.

![]() Further Assistance
Further Assistance
For all D2L issues between 8am - 8pm,
please call the eLearning Office Help Desk.
406-657-2192
After hours, please call the 24/7 Help Desk @
406-247-5755
---
For all other MSUB-supported technologies, our IT and eLearning help desk folks can help you with most university technology resources, and even provides free diagnostics for student computers.
406.247.5700

IT Faculty Resources:
Creating Discussions
Overview
The Discussions tool is a collaboration area where you and students can post, read and reply to messages on varying topics you create.
With the D2L Discussion tool, it is important to note there are 3 main areas: Forums, Topics, and Threads. Forums are the top level that are used for organizing discussion topics. Topics live under Forums and are a place for conversations centered around a specific talking point or assignment. Within a Topic, students will create their own Threads. Threads are where the actual conversation takes place between the class.
Step-by-Step
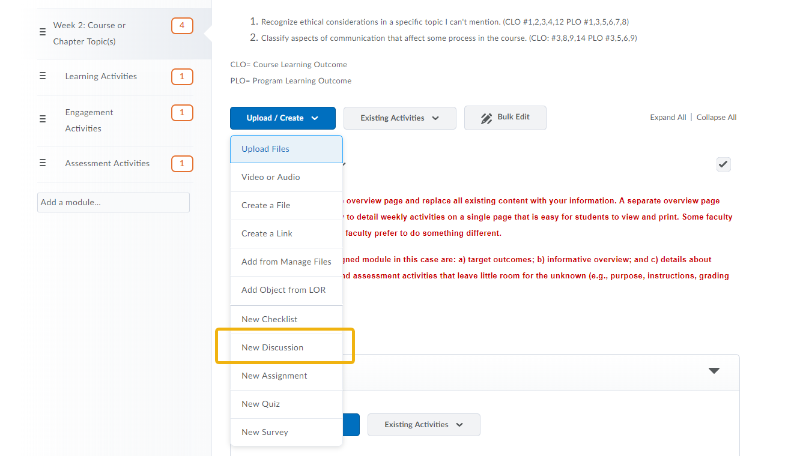
- In your course in D2L, access the content module in which you want to create your discussion forum. You can also click the Discussions link on the navigation bar toward the top of the page.
- In your content module, click Upload/Create and then New Discussion.
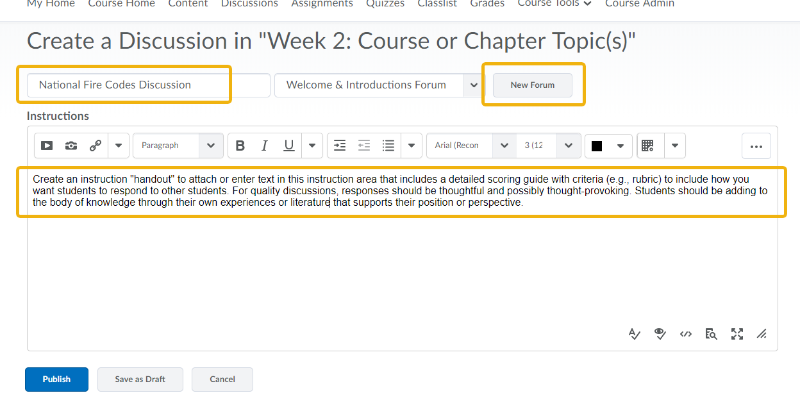
- Enter a title for your discussion topic.
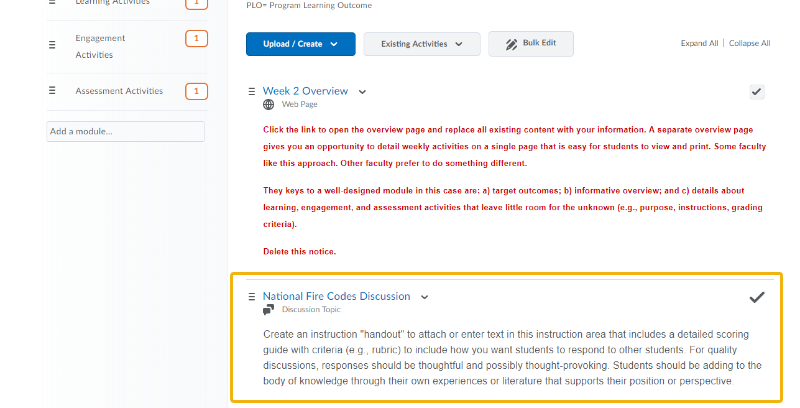
- Enter the instructions into the text area or attach a "handout" of the instructions.
- You'll need to attach the discussion topic to a Forum. Click the New Forum button.
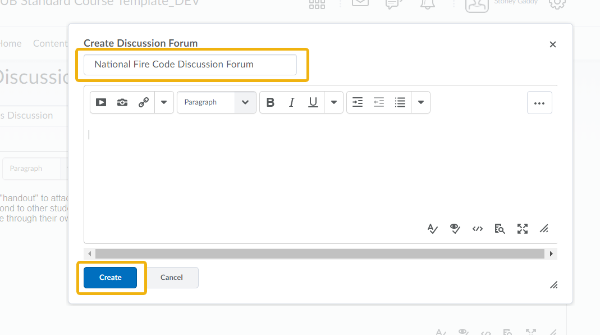
- Enter a Forum title. The forum title should align with, if not mirror, the discussion topic title.
- Click Create.
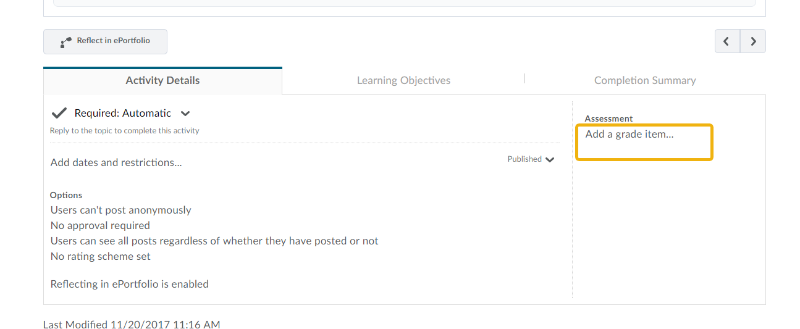
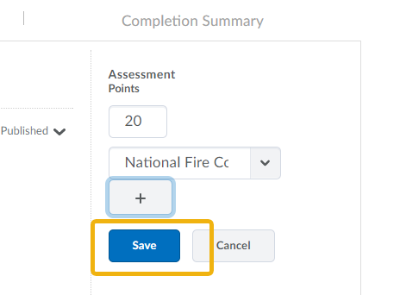
- In the Activity Details tab, you can adjust dates, restrictions, and other options. We'll leave the default settings for these. On the right side of the tab, click the Add a grade item... text.
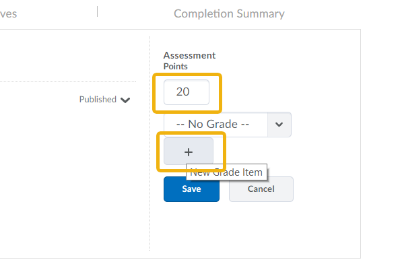
- Enter the point value for the discussion activity.
- Click the + (New Grade Item) button.
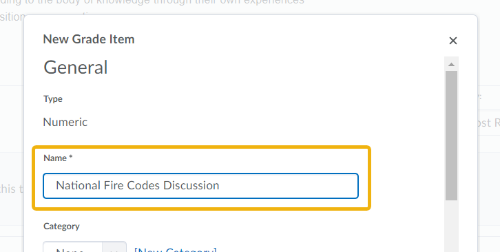
- Enter a Grade Item Name that mirrors the discussion title itself. This will make it easy for students to connect the two when looking at grades.
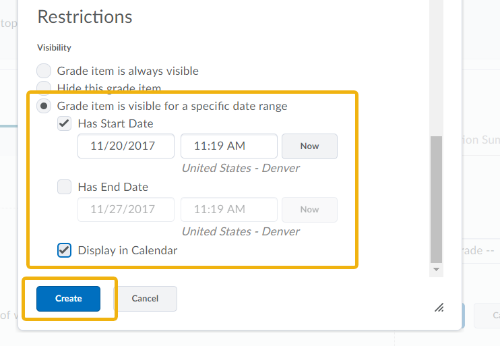
- Scroll through the remaining grade item options. Make adjustments as necessary. Below, I selected the Grade item is visible... option, identified a start date, and checked the Display in Calendar option.
- Click the Create button.
- IMPORTANT! Be sure to click Save once you return to the Activity Details area. This can be easy to overlook and move on. Not clicking Save here will cancel adding the activity to Grades.
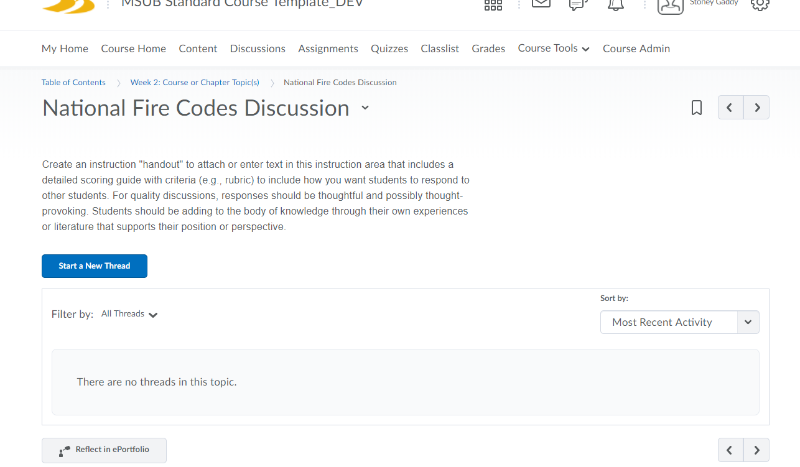
Your discussion topic has now been created. Next, we'll look at Options and associate the discussion with Grade.
Having your assignments, discussions, and quizzes display in the Calendar can be very beneficial to busy students.
Your discussion activity is now ready for student participation and subsequent grading.
![]() Further Assistance
Further Assistance
For all D2L issues between 8am - 8pm,
please call the eLearning Office Help Desk.
406-657-2192
After hours, please call the 24/7 Help Desk @
406-247-5755
---
For all other MSUB-supported technologies, our IT and eLearning help desk folks can help you with most university technology resources, and even provides free diagnostics for student computers.
406.247.5700
IT Faculty Resources:
D2L E-mail
Overview
The D2L Email tool gives you an e-mail address of first.last@billings.desire2learn.com. This is separate from you regular MSUB Outlook (msubillings.edu) e-mail address. Some instructors prefer students use the D2L e-mail for their course just to keep correspondence with students compartmentalized within each course. You'll want to let your students know the preferred methods of communication at the beginning of the course.
Step-by-Step
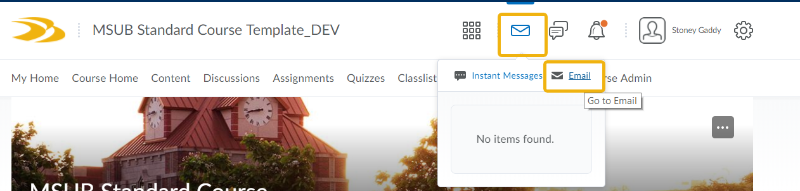
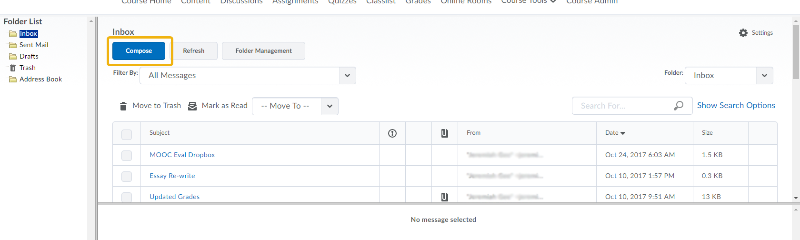
- At the top of D2L (on any page), click the Message Alerts icon and then click the Email text link.
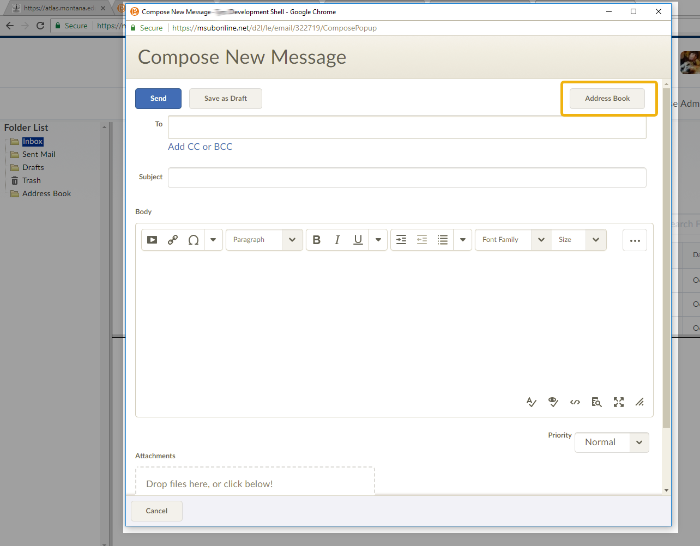
- To compose a new message to send to one or more students, first click the Compose button.
- On the Compose New Message pop-up window, click the Address Book button.
- Select one or more student recipients and then click the Add Recipients button.
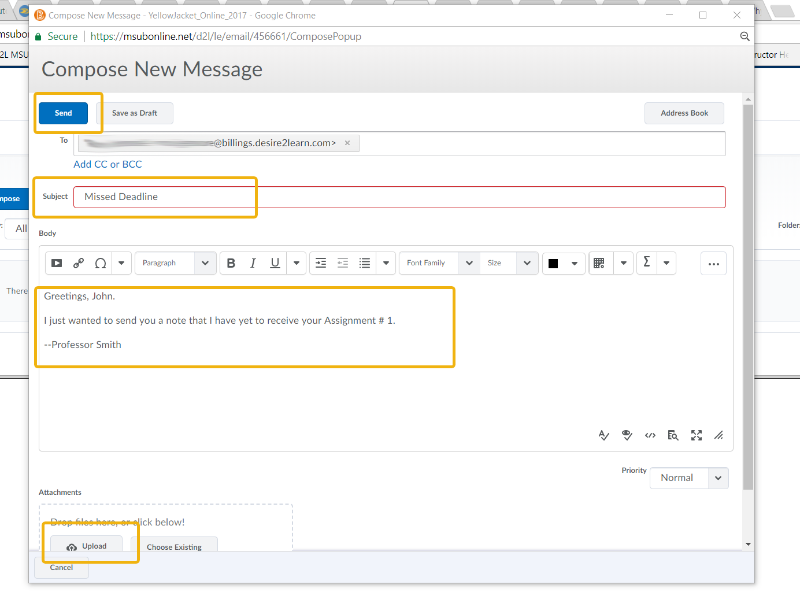
- Add a Subject, enter your message, attach a file if necessary and click Send.
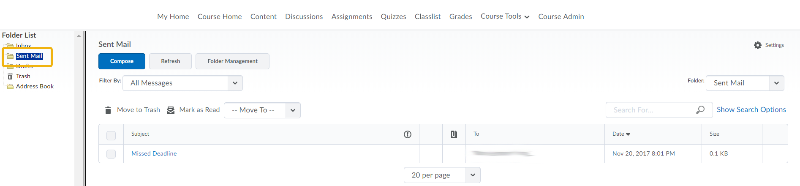
- You can view your sent email in the Sent Mail folder.
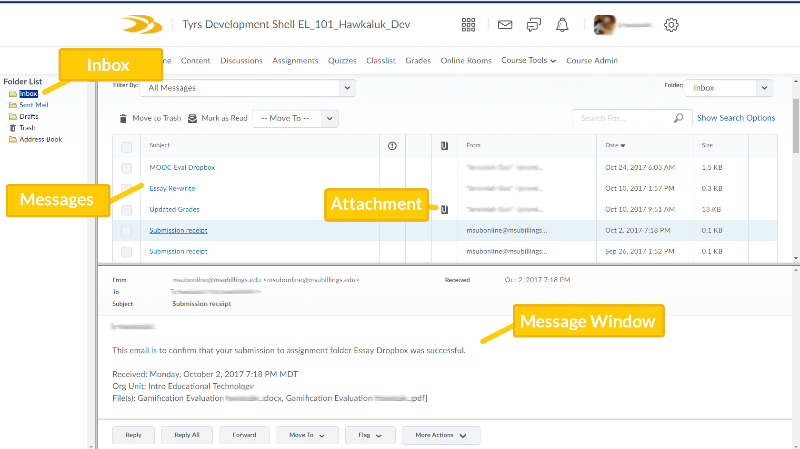
The D2L Email window has many of the typical Email features: You'll see the Inbox folder, messages, file attachments sent via email, as well as the standard Reply, Reply to All, and Forward buttons in the Message Window.
Composing an Email
If you do not see a pop-up, you may need to allow pop-ups from msubonline.net or disable the blocker while you compose your email.

![]() Further Assistance
Further Assistance
For all D2L issues between 8am - 8pm,
please call the eLearning Office Help Desk.
406-657-2192
After hours, please call the 24/7 Help Desk @
406-247-5755
---
For all other MSUB-supported technologies, our IT and eLearning help desk folks can help you with most university technology resources, and even provides free diagnostics for student computers.
406.247.5700
IT Faculty Resources:
Instant Messaging
Overview
The D2L Email tool gives you an e-mail address of first.last@billings.desire2learn.com. This is separate from you regular MSUB Outlook (msubillings.edu) e-mail address. Some instructors prefer students use the D2L e-mail for their course just to keep correspondence with students compartmentalized within each course. You'll want to let your students know the preferred methods of communication at the beginning of the course.
Step-by-Step
- At the top of D2L (on any page) ,click the Message Alerts icon and then click the Instant Messages text link.
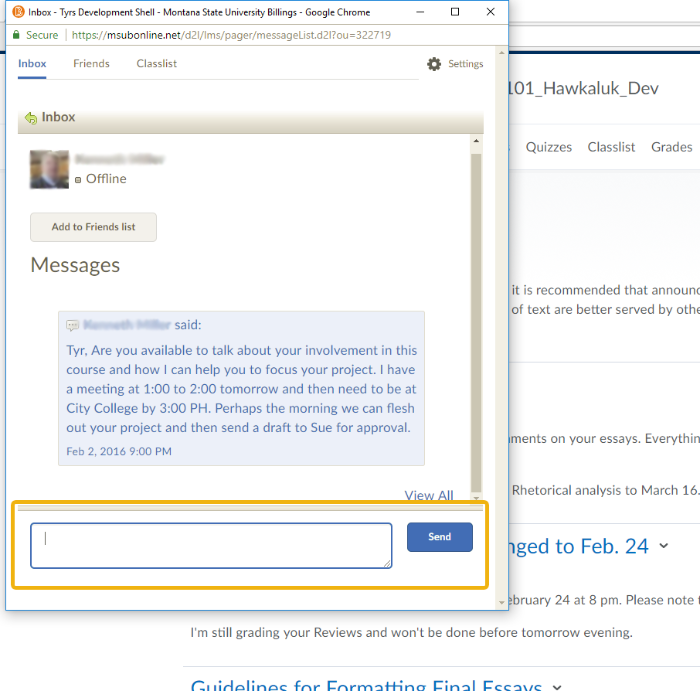
- Once the Instant Messages window pops up, you can click view the Inbox, Friends list, and the Classlist to locate and chat with your students.
- Once in a conversation, you can send messages back and forth in real time with ease. You can still send messages to those who are offline. They will see your message the next time they log in and access Instant Messages.

If the window does not pop up automatically, you may need to allow msuboline.net through your pop-up blocker, or disable it to access your Instant Messaging.
 |
 |
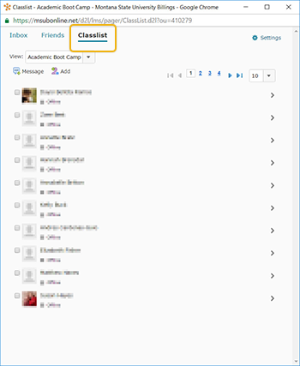 |
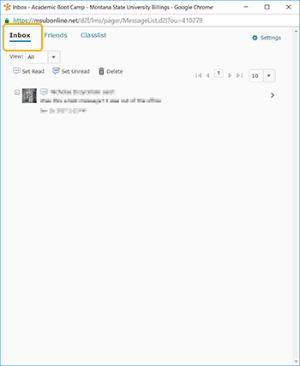
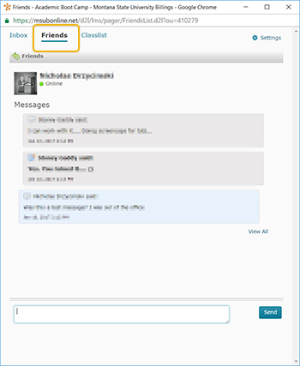
| The Inbox lists all D2L users you have communicated with or have reached out to you. To remove someone, select the check box next to their profile picture and click the Delete button above. | Your Friends list can be both instructors and students who are not in your current class but are in D2L. Anyone who is currently logged into D2L will show as online with the little green circle below their name. | Reach out to any of your students in the Classlist. Students who are online will have the little green circle lit below their name. |
![]() Further Assistance
Further Assistance
For all D2L issues between 8am - 8pm,
please call the eLearning Office Help Desk.
406-657-2192
After hours, please call the 24/7 Help Desk @
406-247-5755
---
For all other MSUB-supported technologies, our IT and eLearning help desk folks can help you with most university technology resources, and even provides free diagnostics for student computers.
406.247.5700
IT Faculty Resources: