Assignments and Grades
Not just for online courses, many professors in classroom courses use D2L as a convenient avenue for students to submit assignments and complete quizzes. Another wonderful feature of the digital environment is the ability for students to quickly see results, instructor feedback, and their grades.
Creating an Assignment
Overview
Do you want a single, convenient place where students can turn in their assignments? In D2L, assignment submission folders not only collect students’ assignments, but also let you read, grade, and provide feedback. Even though these folders are technically called Assignment Submission Folders, they are more often called either Assignment Folders or Submission Folders. In this tutorial, we will be calling the folders Assignment Folders.
NOTE: By default, assignments submission folders are hidden. Your students will not be able to see the folder until you allow it to be seen. Please see the Restrictions Tab section.
Step-by-Step
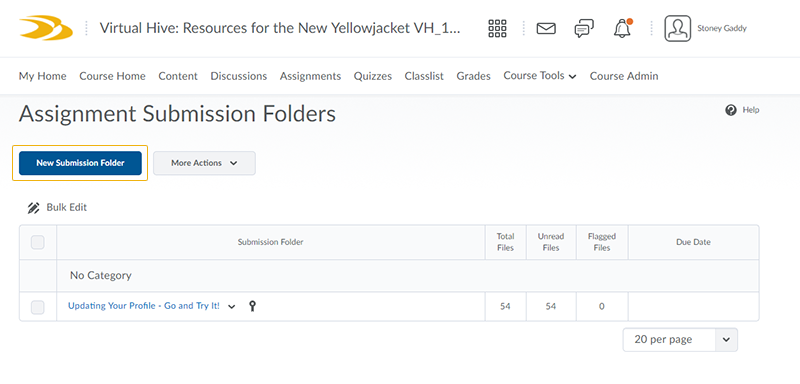
- Inside your D2L course, click on the Assignments tab near the top of the page.
- On the Assignment Submission Folders page, click on the New Submission Folder button.
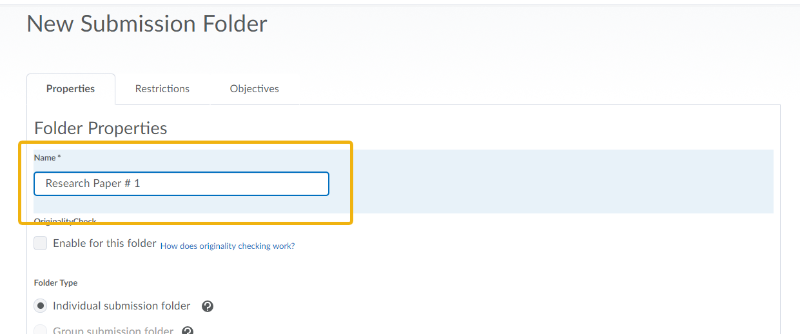
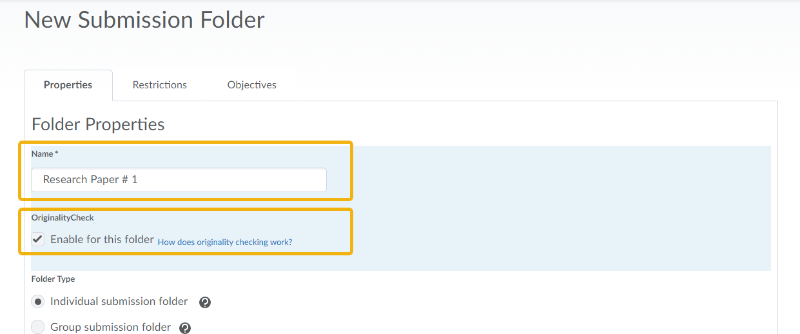
- Give your assignment a Name:
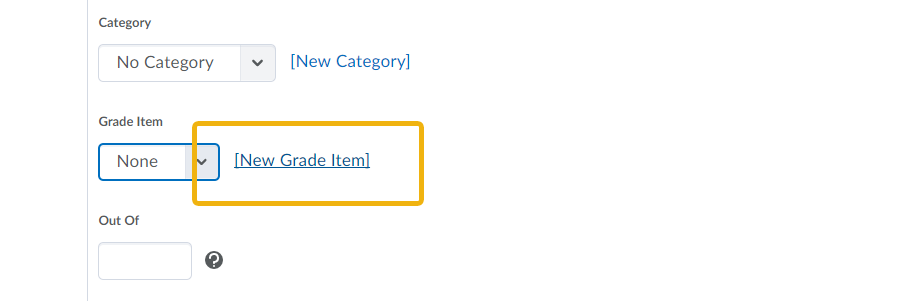
- Chances are, you want the assignment to be associated with the D2L grade book. If so, please follow steps 5-7; otherwise, skip ahead to step 8. Click the New Grade Item link.
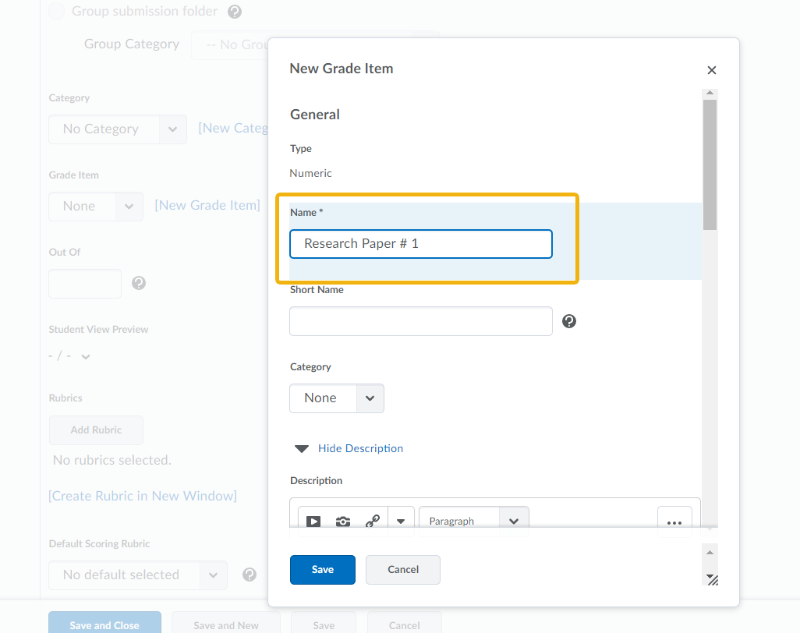
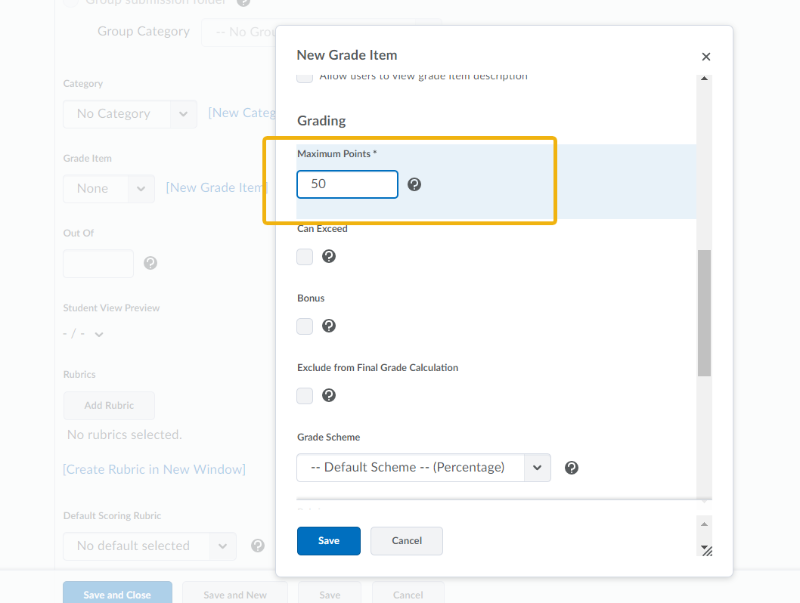
- On the New Grade Item pop-up window, enter the Name: of the assignment as you want it to appear in the grade book. To be consistent, you will likely want the name to be the same as in the assignment folder.
- In the Grading section, identify the Maximum Points possible for the assignment.
- Scroll through the remaining options and then click Save.
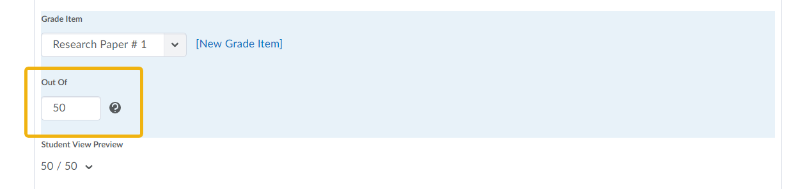
- Enter the number of points possible in the Out Of text box. If you associated this assignment with the grade book (steps 5-7), you'll want to make sure the points possible match.
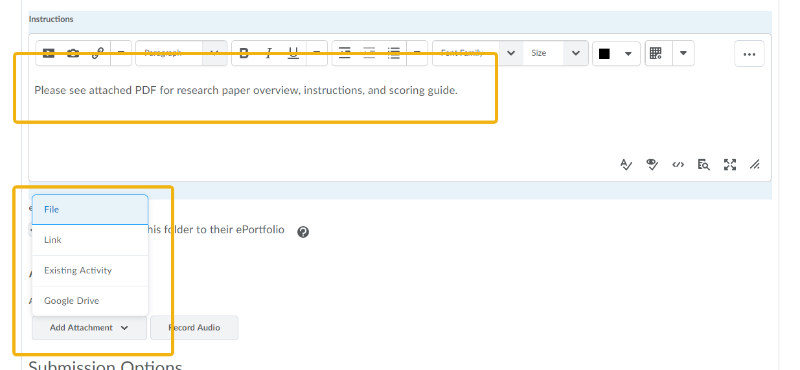
- We'll now provide some text in the Instructions text box.
- In this example, I have a PDF document with instructions and a scoring guide (rubric) I want to attach. Click the Add Attachment button and select File.
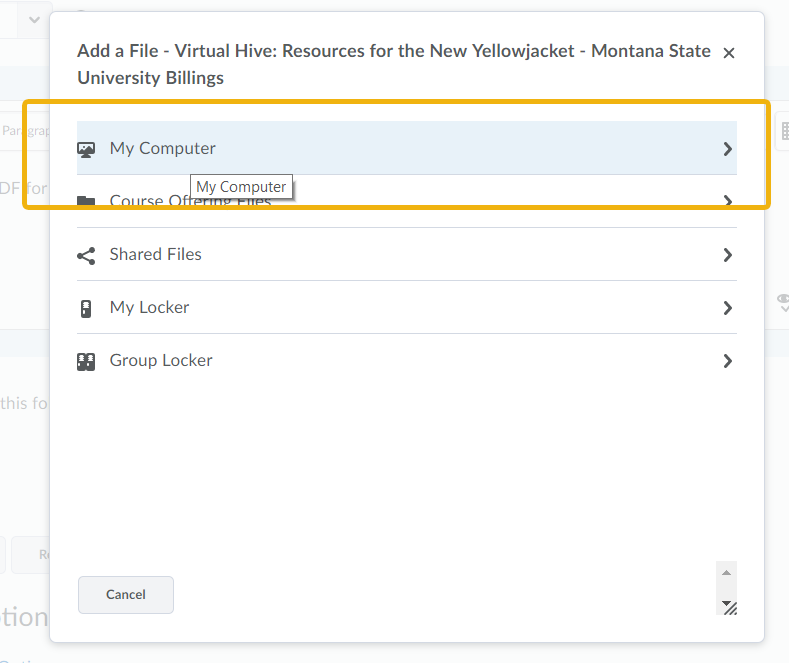
- You'll start by clicking My Computer on the Add a File pop-up window. Follow the process until you've uploaded and attached your assignment file.
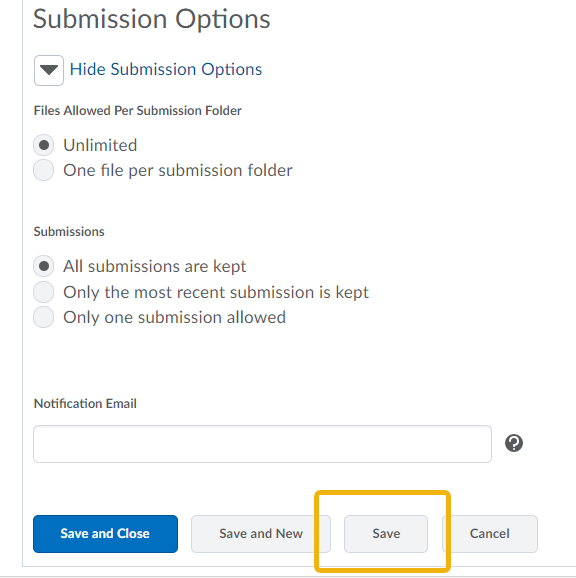
- Once you return to the Edit Submission Folder screen after attaching your file, scroll to the bottom of the page and click Save. We don't want to close just yet.
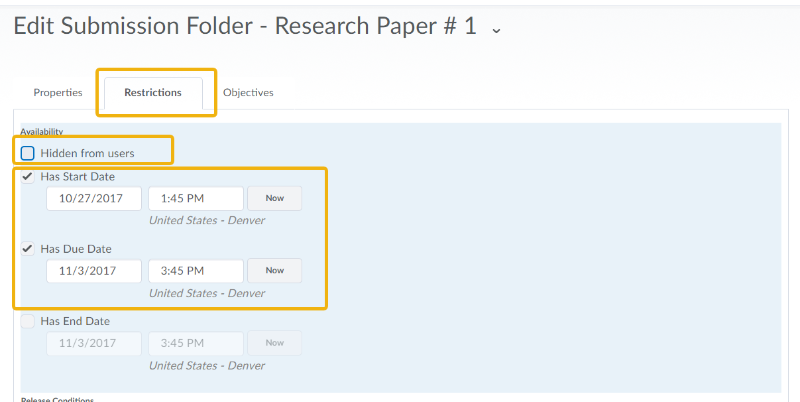
- Next, let's click the Restrictions tab at the top of the page.
- Uncheck Hidden from users so students can access the assignment.
- Next, you can select a Start Date and, more importantly, a Due Date and time so students know exactly when the assignment is due.
- When done, click the Save and Close button at the bottom of the page.

NOTE: There are a number of options as you scroll through the New Submission Folder page.
This tutorial will focus on a handful of options. Please look over all possibilities
that give you control over how your assignments are conducted in D2L.
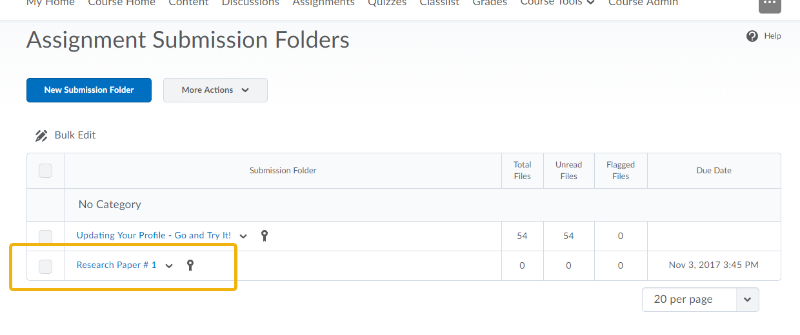
Congratulations! You have created an assignment folder!
Your assignment will appear in the Assignments page as shown below:
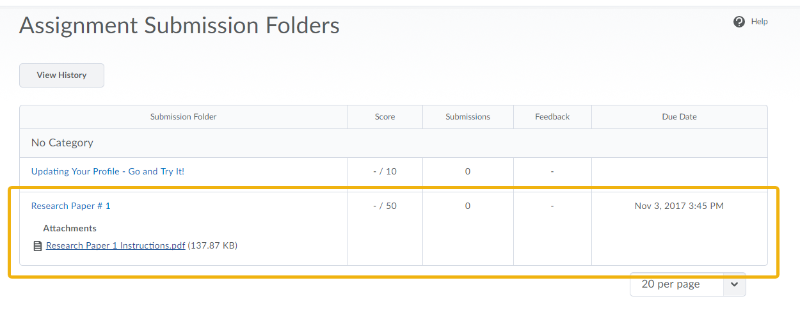
Students will see the assignment as shown below:

![]() Further Assistance
Further Assistance
For all D2L issues between 8am - 8pm,
please call the eLearning Office Help Desk.
406-657-2192
After hours, please call the 24/7 Help Desk @
406-247-5755
---
For all other MSUB-supported technologies, our IT and eLearning help desk folks can help you with most university technology resources, and even provides free diagnostics for student computers.
406.247.5700

IT Faculty Resources:
Originality Checking (Turnitin)
Would you like to check the originality of students' submissions? Turnitin is integrated into D2L, making plagiarism detection a one-click process. Further, while the grading and feedback features of D2L are excellent, Turnitin also has a built-in markup solution called GradeMark. GradeMark can be explored further here.
Step-by-Step
- Inside your D2L course, click on the Assignments tab near the top of the page.
- On the Assignment Submission Folders page, click on the New Submission Folder button.
- Give your assignment a Name:.
- Here's the most important part: Click the Enable for this folder check box to turn on the Turnitin Originality Checker
- Chances are, you want the assignment to be associated with the D2L grade book. If so, please follow steps 5-8 otherwise, skip ahead to step 9. Click the New Grade Item link.
- On the New Grade Item pop-up window, enter the Name: of the assignment as you want it to appear in the grade book. To be consistent, you will likely want the name to be the same as in the assignment folder.
- In the Grading section, identify the Maximum Points possible for the assignment.
- Scroll through the remaining options and then click Save.
- Enter the number of points possible in the Out Of text box. If you associated this assignment with the grade book (steps 5-8), you'll want to make sure the points possible match.
- We'll now provide some text in the Instructions text box.
- In this example, I have a PDF document with instructions and a scoring guide (rubric) I want to attach. Click the Add Attachment button and select File.
- You'll start by clicking My Computer on the Add a File pop-up window. Follow the process until you've uploaded and attached your assignment file.
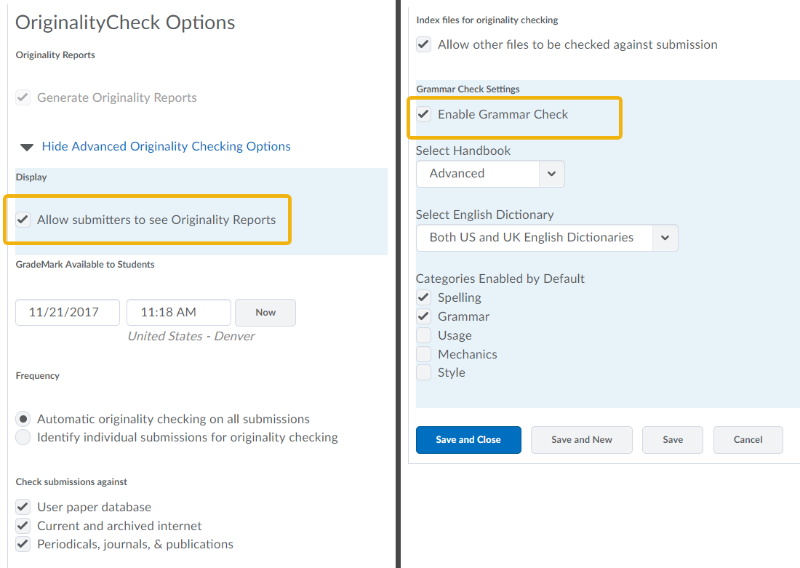
- Once you return to the Edit Submission Folder screen after attaching your file, scroll down to the OriginalityCheck Options and make the selections. For example, You'll likely want your students to see their originality reports as a learning moment. Further, you may want all or selected Grammar Check options.
- Next, let's click the Restrictions tab at the top of the page.
- Uncheck Hidden from users so students can access the assignment.
- Next, you can select a Start Date, a Due Date and time so students know exactly when the assignment is due.
- When done, click the Save and Close button at the bottom of the page.
NOTE: There are a number of options as you scroll through the New Submission Folder page.
This tutorial will focus on a handful of options. Please look over all possibilities
that give you control over how your assignments are conducted in D2L.
Grading
NOTE: There are a number of options as you scroll through the New Submission Folder page. This tutorial will focus on a handful of options. Please look over all possibilities that give you control over how your assignments are conducted in D2L.
OriginalityCheck Options
![]()
As mentioned above, we recommend reading the Interpreting the Similarity Report and Viewing the Similarity Report tutorials on the Turnitin Website.
When finished with the assignment Properties, scroll to the bottom of the page and click Save. We don't want to close just yet.
Restrictions
Congratulations! You have created an assignment folder with Turnitin's OriginalityCheck activated!
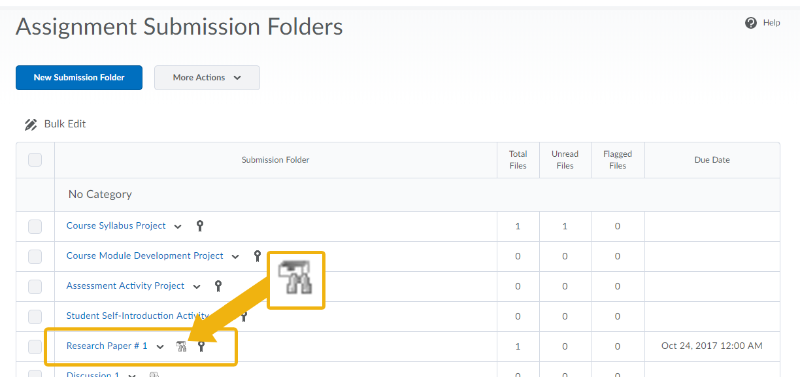
Your assignment will appear in the Assignments page with the OriginalityCheck icon displayed (box/binoculars) as show below:
![]() Further Assistance
Further Assistance
For all D2L issues between 8am - 8pm,
please call the eLearning Office Help Desk.
406-657-2192
After hours, please call the 24/7 Help Desk @
406-247-5755
---
For all other MSUB-supported technologies, our IT and eLearning help desk folks can help you with most university technology resources, and even provides free diagnostics for student computers.
406.247.5700
IT Faculty Resources:
Creating Quizzes and Exams
Overview
Creating a quiz, or exam, in D2L is simple enough to do; however, doing so from scratch can be time consuming if you are creating one question at a time. Your textbook publisher will likely have course packages containing test banks that can be imported directly into D2L. There are also test generator software programs out there such as TestGen and ExamView. Further, the eLearning department will convert your testbanks into D2L format using Respondus. Small quiz or large exam from scratch, below are the steps to create a quiz (exam) in D2L.
*NEW* Creating a Quiz video guide
Step-by-Step
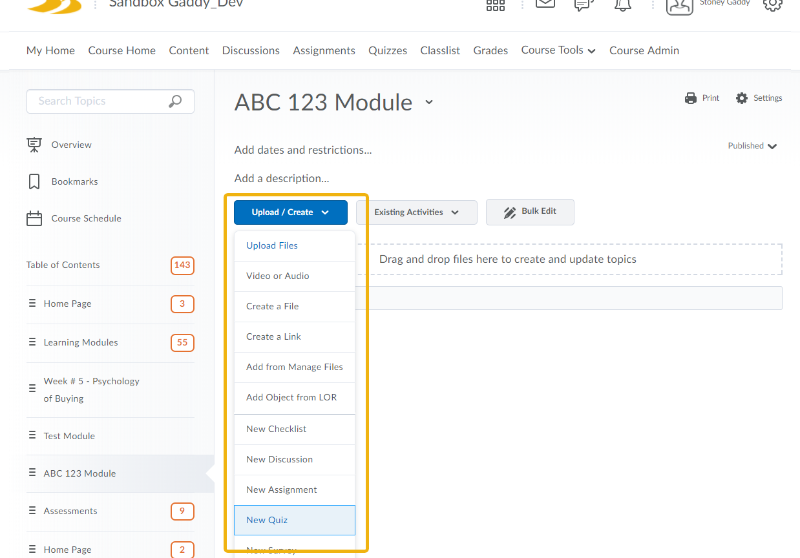
- Access the content module where you want to create the quiz. If you are not using modules, you can click on the Quizzes link at the top of the D2L page to start the quiz creation process.
- Click the Upload / Create drop-down button and select New Quiz.
- In the Properties tab, give your quiz a Name: and then click Add/Edit Questions.
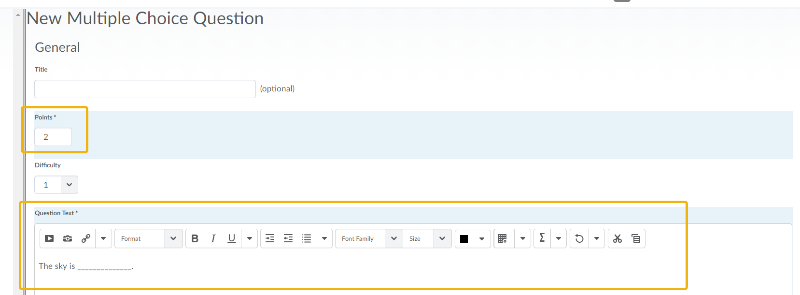
- Once in the Quiz window, click New and then select the question type (Multiple Choice in the example below).
- Set the point value for the question and then enter your question text.
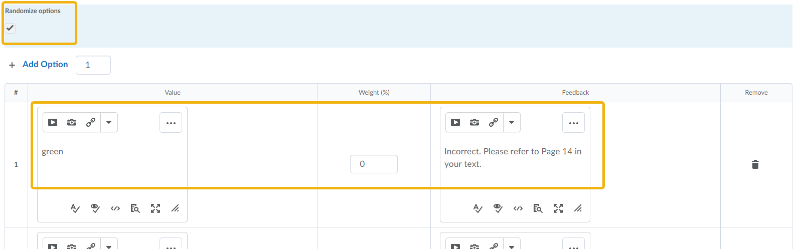
- I've selected Randomize options and then start entering option text and feedback if you'd like. Once again, this is a multiple choice example.
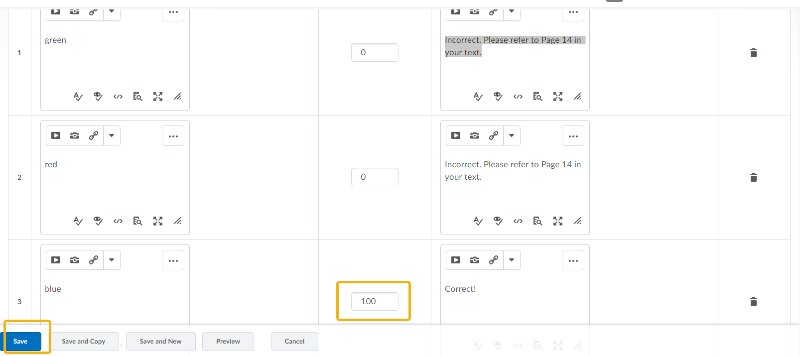
- Enter the remaining options. Make sure you identify the correct option with a 100 as D2L is looking for a % correct. For multiple correct answers, you'd simply do the math. For example if there are two correct answers, each would be worth 50(%). The exact behavior of the scoring depends on the type of question.
- When done with the question, click Save at bottom.
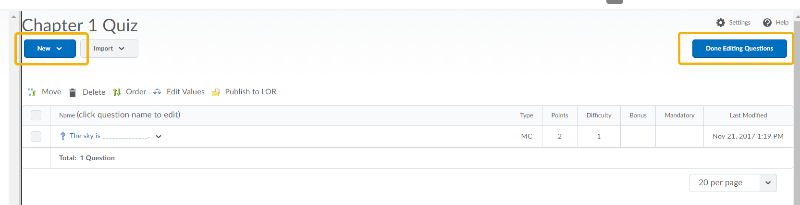
- To add another question, click the New button and keep going. When done, click Done Editing Quesions.
- Make additional selections and choose your preferred settings such as Shuffle order of questions.
- Enter a description / introduction for students to see.
- When done setting the parameters in the Properties tab, click Save at bottom. Don't click Save and Close just yet. There are two more tabs we need to visit.
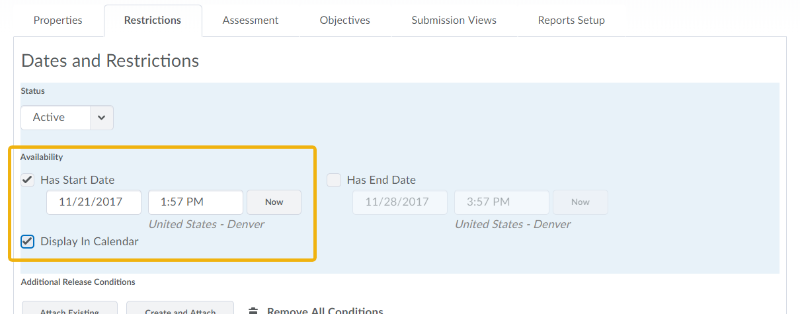
- Click the Restrictions tab toward the top of the page.
- Change the Status to Active and adjust the Availability to have a Start Date. You can set an End Date as well.
- Check the Display in Calendar option.
- Click the Save button at bottom and then go to the Assessment tab.
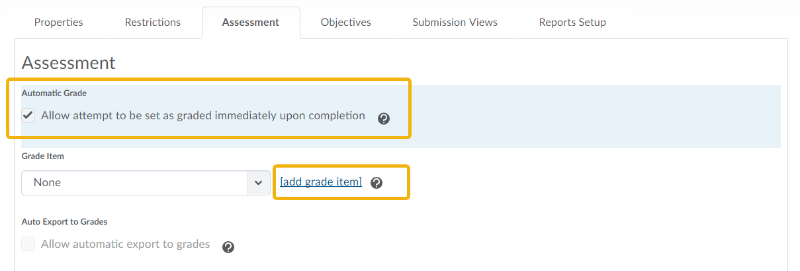
- To add the quiz to the D2L grade book, click the Allow attempt to be set at graded... checkbox and then click the [add grade item] link.
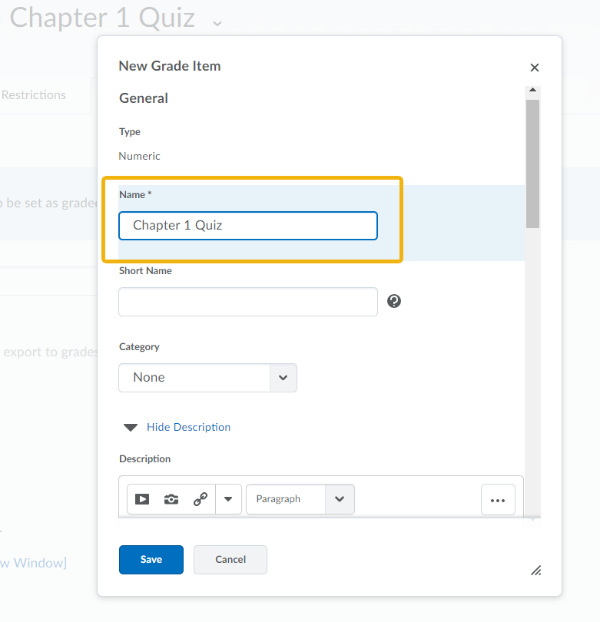
- Give the quiz grade item a name. It is recommended names for the gradebook mirrow the quiz name.
- Make any other adjustments and then click the Save button.
- Once back to the Assessment tab, select the Allow automatic export to grades check box.
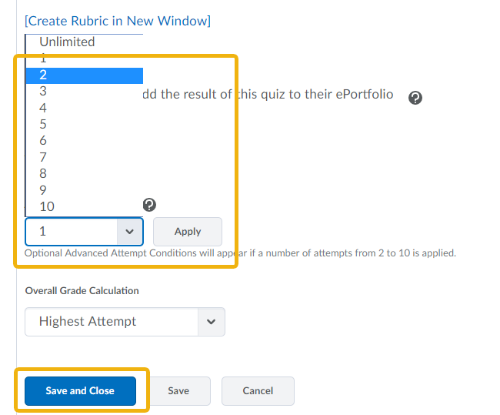
- Identify the maximum number of attempts and click the Apply button.
- When done, click Save and Close.


NOTE: There are a number of options as you scroll through the Properties tab. This tutorial will focus on a handful of options. Please look over all possibilities that give you control over how your assignments are conducted in D2L.


NOTE: There are a number of options as you scroll through the Assessment tab. This tutorial will focus on a handful of options. Please look over all possibilities that give you control over how your assignments are conducted in D2L.

Your quiz is now located in the module for students to see and complete!

![]() Further Assistance
Further Assistance
For all D2L issues between 8am - 8pm,
please call the eLearning Office Help Desk.
406-657-2192
After hours, please call the 24/7 Help Desk @
406-247-5755
---
For all other MSUB-supported technologies, our IT and eLearning help desk folks can help you with most university technology resources, and even provides free diagnostics for student computers.
406.247.5700
IT Faculty Resources:
Grades and Feedback
Overview
It is very likely you will, at some point, create assignment folders, discussions, and other activities in D2L that carry a grade. Using D2L for submitting assignments can cut down on the need for student printing and doesn't require you to carry around stacks of assignments from the classroom to the office to home and back.
Step-by-Step
The following steps take you through grading within D2L on your work or personal computer. If you are interested in the D2L Assignment Grader App for your iPad or Android tablet, please click here.
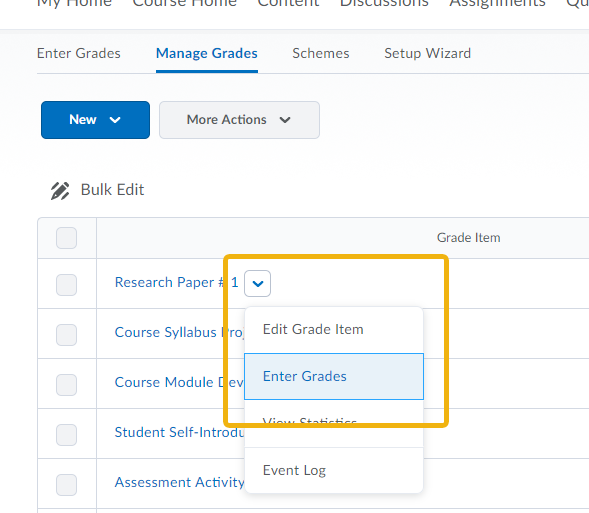
- To grade an assignment , first click the Grades link on the navigation bar.
- In the Manage Grades section, click the down arrow at right of the assignment you wish to grade and select Enter Grades.
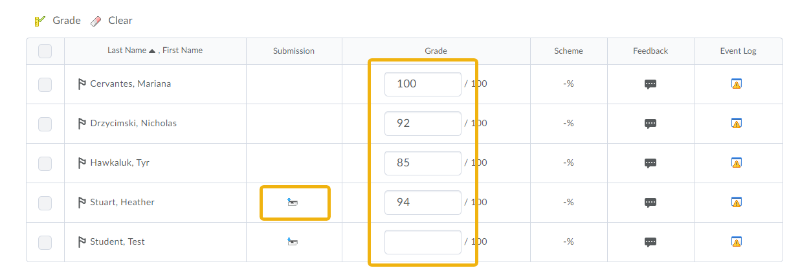
- You can directly enter your grades in the available boxes. To save your work. Click on the blue Save button at the bottom of the page.
- To enter a screen where it may be a bit easier to enter grades AND provide feedback on a specific grade item, click on the New submission button highlighted below.
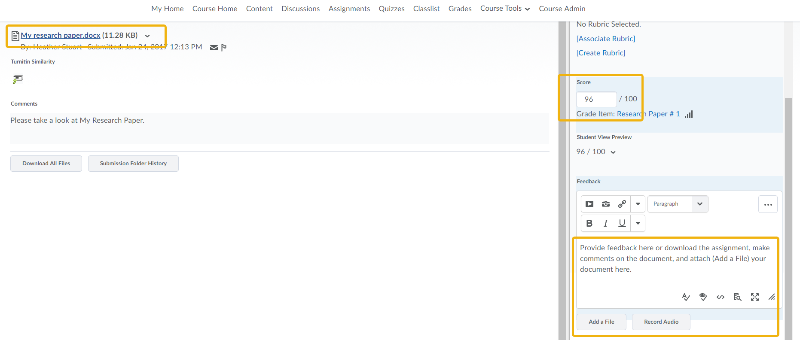
- In the following window, you can download the student submission, enter scores, and provide feedback in the provided textbox. Many professors download the student submission to make comments directly on the document to then upload that document so students can read comments contextually.
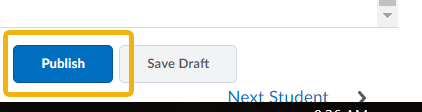
- When you are finished grading and proving feedback, click the blue Publish button.
- You can then move on to the next student.

![]() Further Assistance
Further Assistance
For all D2L issues between 8am - 8pm,
please call the eLearning Office Help Desk.
406-657-2192
After hours, please call the 24/7 Help Desk @
406-247-5755
---
For all other MSUB-supported technologies, our IT and eLearning help desk folks can help you with most university technology resources, and even provides free diagnostics for student computers.
406.247.5700
IT Faculty Resources: