Webex Desktop App
The Cisco Webex Meetings desktop app is an easy way to start, schedule, or join Webex meetings without having to go to the Webex web site. Below is information on how to use the app.
How to Download and Install
For Windows:
- Log into the Webex portal at:
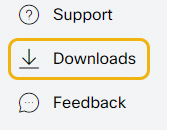
- Click the Downloads link on the left hand menu.
- Click the Download button with the Windows icon.

- When the Save As window appears, save the file in a desired location.
- When the download finishes, run the .msi installation file.
- When the Webex Meetings Desktop app opens, click Next to begin the installation. Accept
the License Agreement and click Next and then click Install. If a prompt asks for
consent to install the app, click Yes. When the installation is completed, click Finish.
- When the desktop app opens, enter your MSUB email address in the Email address text
box and click Next.
- On the "Which Webex site do you want to use" screen, select msubillings-student.webex.com
if you are a student or msubillings.webex.com if you are a staff or faculty member
and then click Next.
- When prompted, enter your NetID and password (the same username/password you use when logging into a computer on campus or D2L) and click OK.
For Mac:
- Log into the Webex portal at:
- Click the Downloads link on the left hand menu.
- Click the Download button with the Apple icon.
- When the download finishes, run the .dmg installation file.
- When the download package opens, double click the Cisco Webex Meetings.pkg file.
- When the Webex Meetings desktop app opens, click Continue to begin the installation.
Click Continue again and then click Install. If prompted for your Mac username and
password, enter them and click Install Software. When the installation completes,
click Close.
- When the desktop app opens, enter your MSUB email address in the Email address text
box and click Next.
- On the "Which Webex site do you want to use" screen, select msubillings-student.webex.com
if you are a student or msubillings.webex.com if you are a staff or faculty member
and click Next.
- When prompted, enter msubillings\NetID and your password (the same username/password you use when logging into a computer on campus or D2L) and click OK.
Starting a Meeting
To start an ad hoc meeting click the green Start Meeting button. This will open your
personal Webex meeting room. When the room opens, all the Webex controls you're use
to will be available.
Scheduling a Meeting
A Webex meeting can be scheduled from within the Cisco Webex Meetings desktop app but it requires Outlook to be installed. To do so:
- Click the schedule button on the top right of the app.
- A Microsoft Outlook meeting appointment will open. A Webex Settings screen will open
the first time you schedule a meeting, click OK.
- In the Outlook meeting screen, add your invitees, enter a subject and location, set the time frames and then click Send. The Webex meeting is scheduled and added to your Outlook calendar and your recipients will receive the email invitation.
Joining a Meeting
The Webex Meetings desktop app can be used to join an in progress Webex meeting. To do so:
- Enter the meeting URL or the host's ID into the "host's personal room ID or link"
text box. (Example: https://msubillings.webex.com/meet/john.doe or john.doe).
- Click the green arrow button.