Webex Breakout Sessions
Breakout sessions allow you to place your meeting participants into smaller groups to collaborate and share ideas. This is great for workshops, classrooms, or for when you just need a moment to talk privately with a few others, outside of the main session.
Breakout sessions are easy to create and manage. You can even have participants assigned
automatically. Being inside of the breakout session is like being in a smaller meeting,
complete with audio and video where participants can collaborate and share content,
or even ask the host in the main session for help. The host can bring everyone back
into the main session at any time or after a scheduled time limit.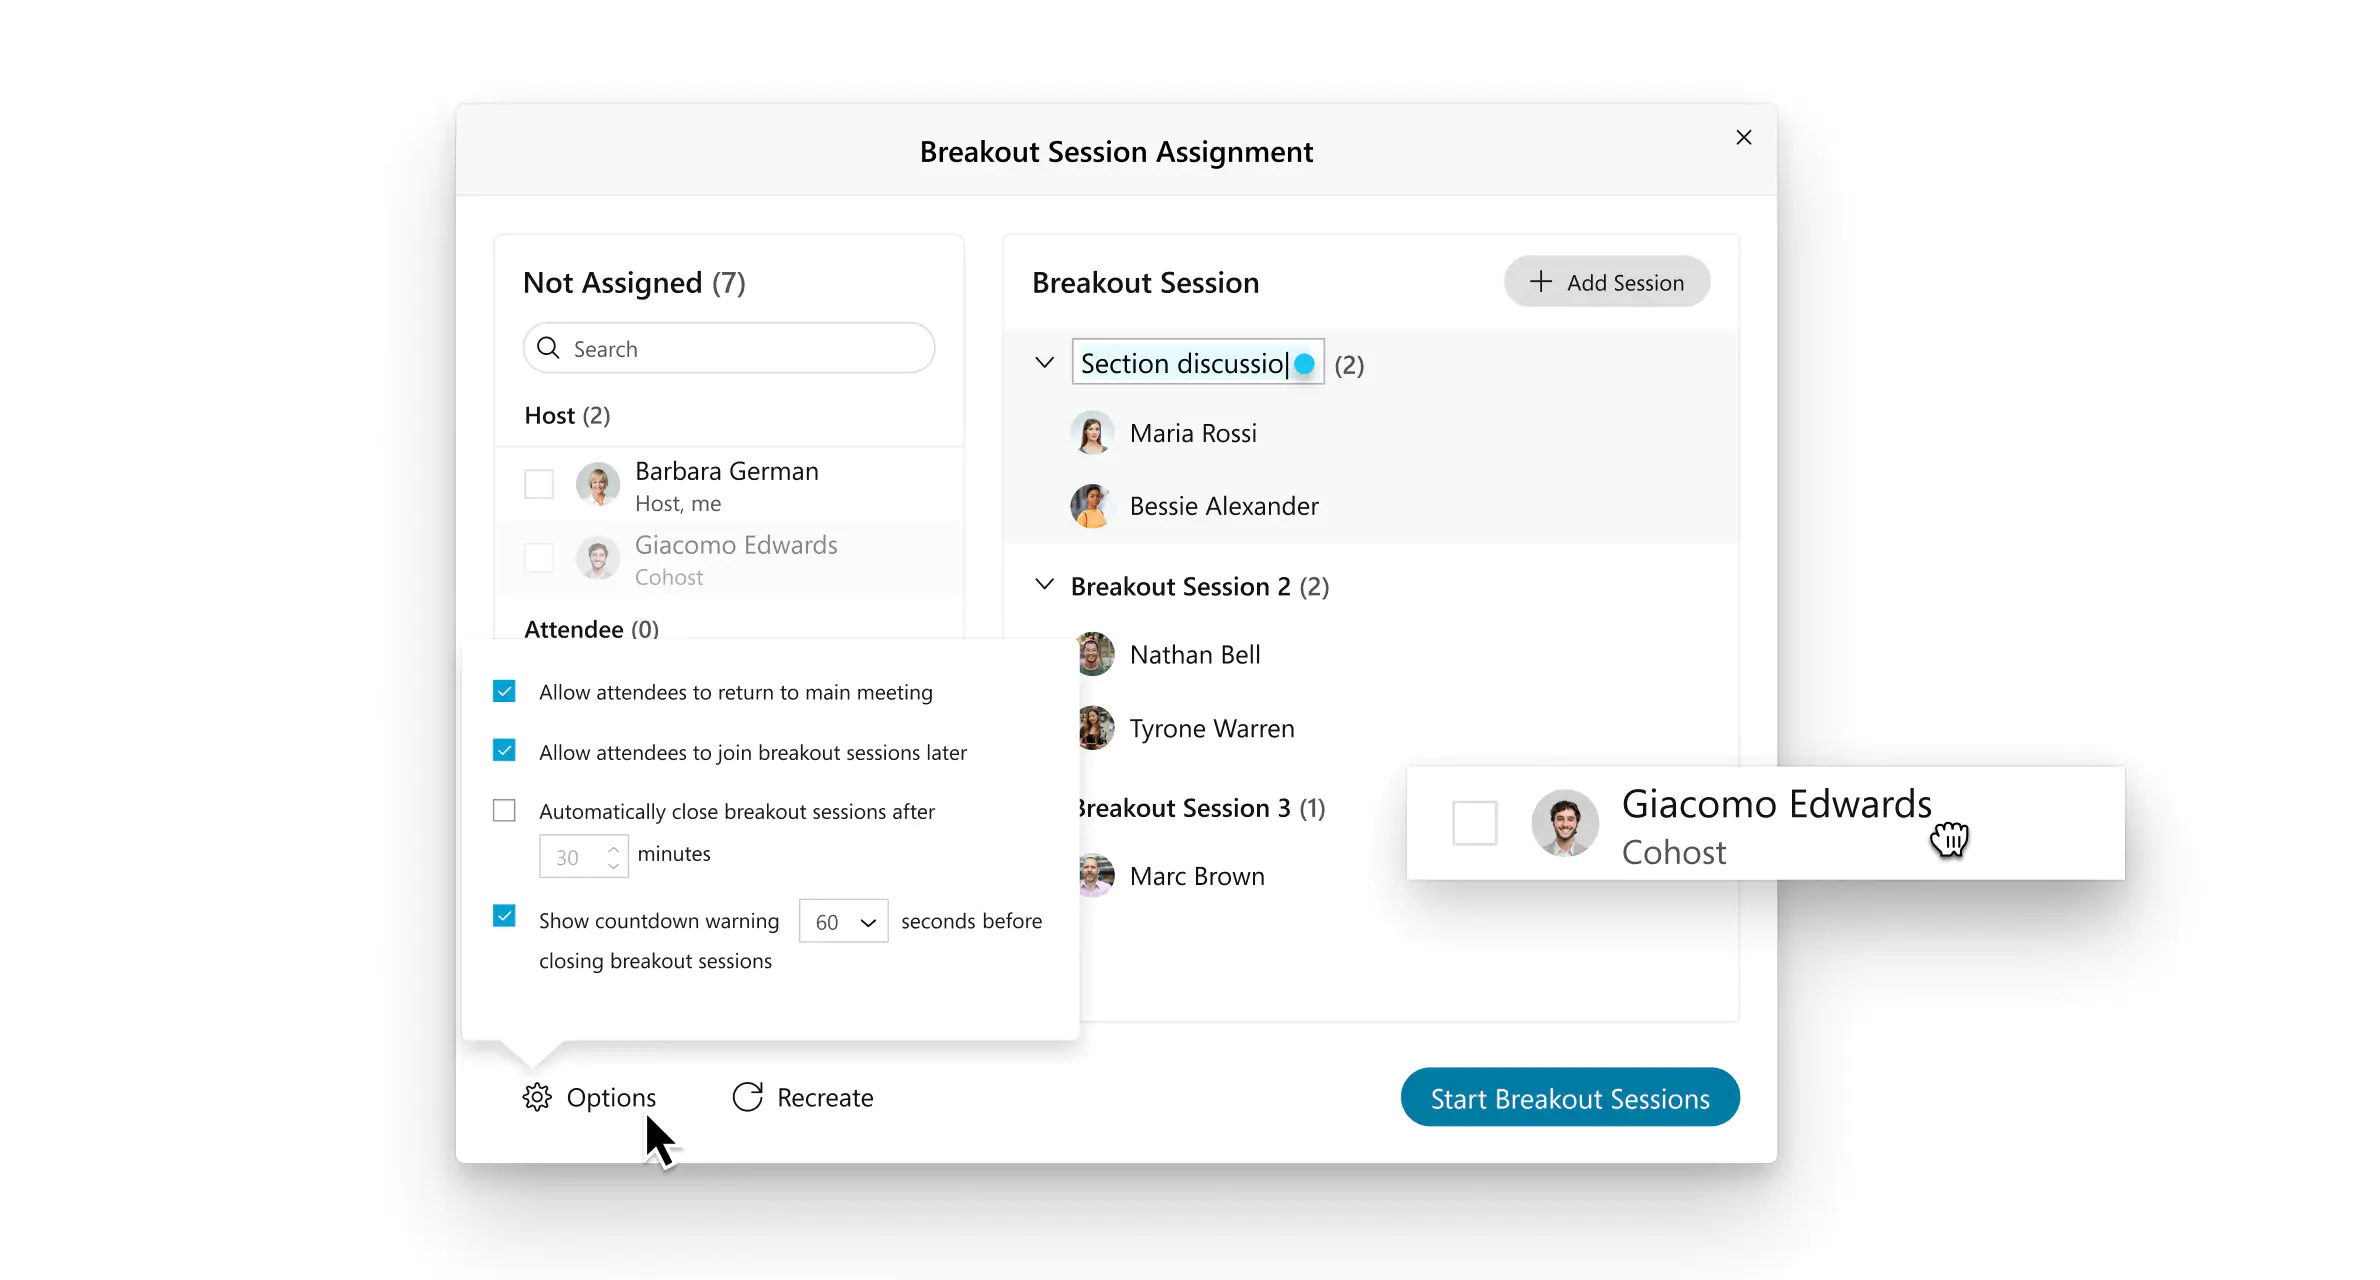
For an in-depth how to of breakout sessions, visit the Cisco website.
Starting a Breakout Session
To create a breakout session, follow the instructions below.
1) To enable a breakout session click the Breakout menu at the top of the Webex window and click Enable Breakout Session.

When the breakout session feature is enabled, the Breakout sessions button appears in the meeting controls.
2) Click the Breakout sessions button on the lower right portion of the Webex window.

Note: Only one host or cohost can have the Breakout session assignment dialog box open at a time.
3) Select the number of breakout sessions that you want to create and how you would like to assign your participants:
- Automatically: Let the system split your participants up evenly into each of the breakout sessions.
- Manually: You assign participants to each breakout session.
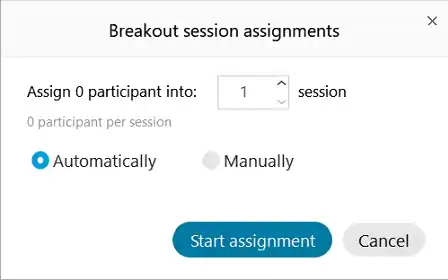
4) Click the Start assignment button to initiate the breakout session rooms.
The breakout sessions are created. By default, breakout sessions are named Breakout
session 1, Breakout session 2, and so on. You can rename the breakout sessions later.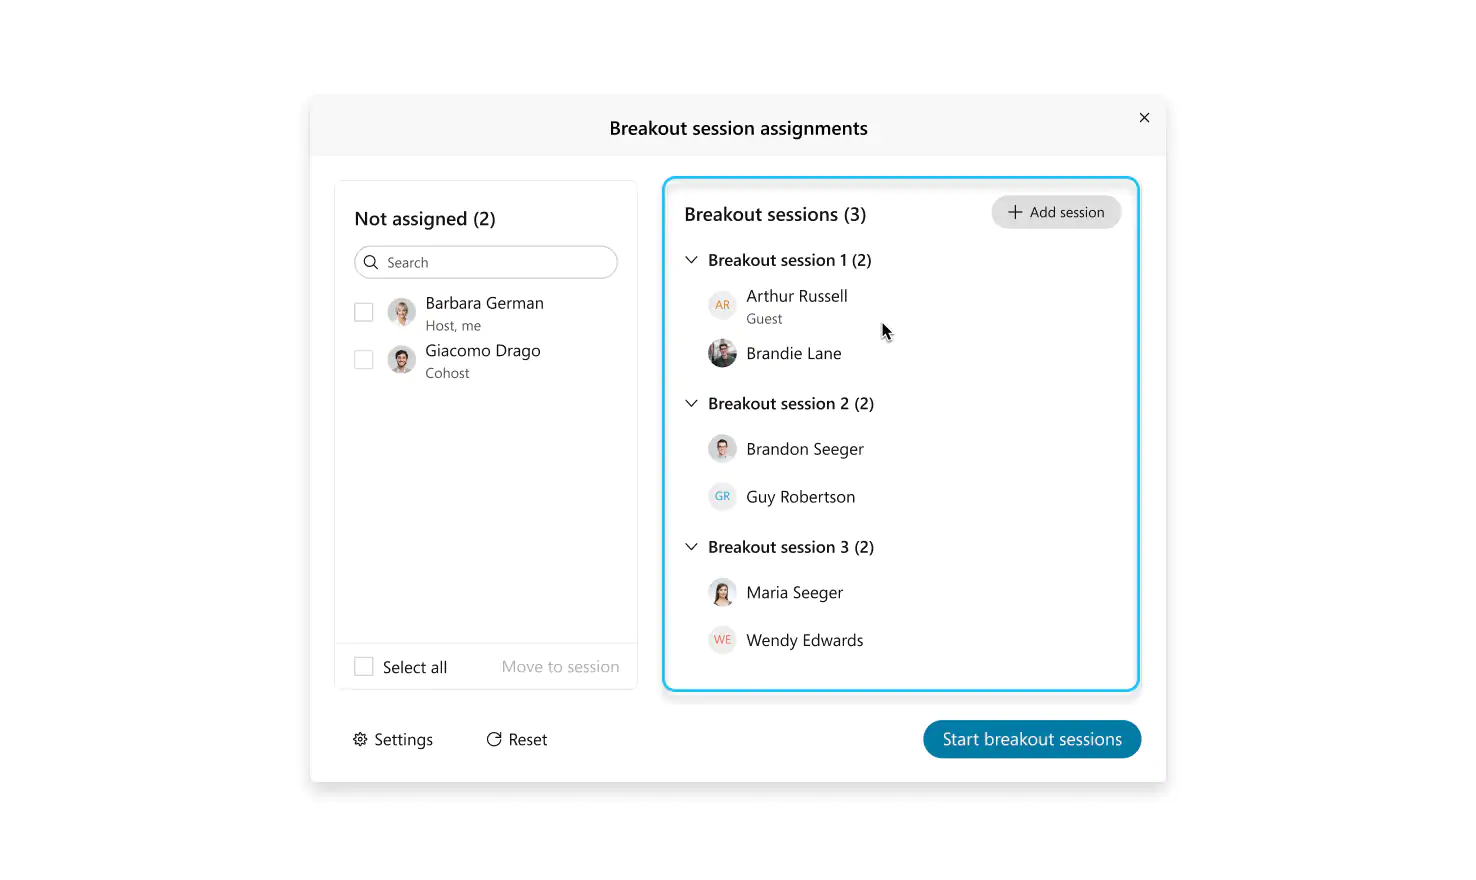
If you chose Automatically in Step 3, the participants are assigned. If you chose Manually in Step 3, assign participants to breakout sessions.
If you want to change the number of breakout sessions or how the participants were assigned, click Reset and repeat Steps 3 and 4. The new breakout sessions replace all existing sessions.
5) When you're ready to start all breakout sessions, click the Startbreakout sessions button.

Current Breakout Session Limitations
As breakout sessions are a new feature, they're are currently some limitations that will be made available at a future date. Current features that do not work in breakout sessions:
- Raise hand, People Insights profile, and the notes taker role
- Webex Assistant for Meetings
- Closed captioning
- Recording breakout sessions
- High frame rate content sharing ("Optimize for motion and video")
- Sharing web browser
- Sharing multimedia
- Annotation and Whiteboard
- Remote control
- Live streaming
- Polling
- Saving chat
- Users who join from the Webex Meeting web app can’t share content”