Using Webex Teams
Here’s a highlight of each functional section within Webex Teams.
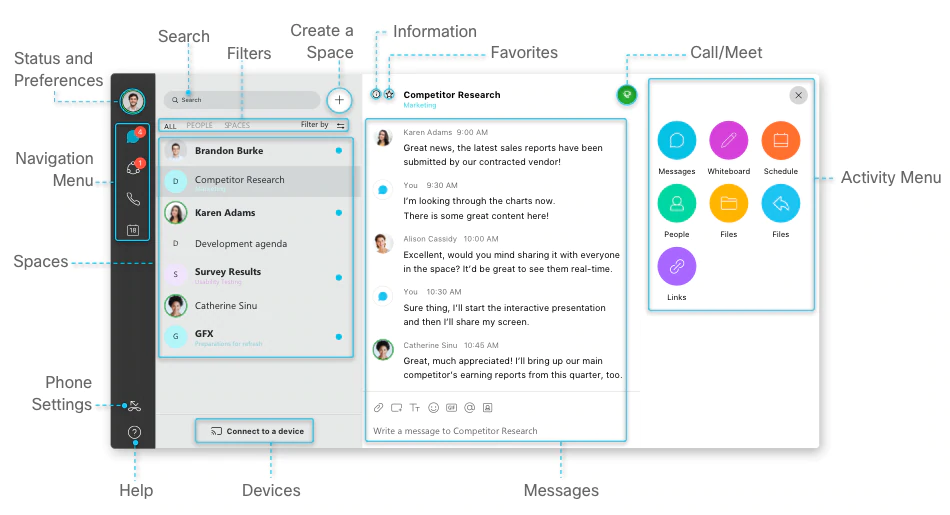
Status
If you have some important work to finish or are on a call, let people know that you don't want to be disturbed: whether that's for a few minutes or an entire day is up to you.
Navigation Menu
Switch easily among your message, team, and call views. Messages appear by default, but your teams and recent calls are just a click away.
People
Your conversations between just you and one other person appear here. You can keep track of those important one-to-one conversations separately from your group messages.
Spaces
Group work takes place within spaces. They display prominently so you can get to them whenever you need to. Your most recently active spaces are at the top. If anyone has added you to a new team or space, you'll see it here too. When someone's posted a new message in the space, you'll see a blue dot next to it.
Filters
Filter messages to see the ones that matter most to you.
Messages
Messages are where you chat with colleagues. Messages are secure so you can feel confident sharing your ideas in Webex Teams.
Spaces
For sharing your screen when connected to a Cisco Webex Board.
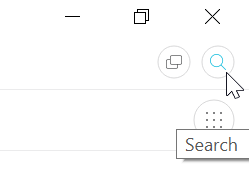
Search
Search through the history of your conversations to find people you're talking to, spaces you're in, messages you received, and files you need.
Activity Menu
Whenever you're in a space, click the activity menu icon on the top right corner of the screen to get access to all the different activities you can do:
- Message—send a message to just one person or to many people in a space.
- Video Calls—place a video call to anyone in the space.
- Meetings—create or attend a meeting.
- People—see who else is in the space.
- Files—find your shared files, photos, and whiteboard content.
- Whiteboard—create and share content on the whiteboard.
Instant Messaging
Webex Teams provides two methods of instant messaging: person to person or room/team based messaging.
Person to Person
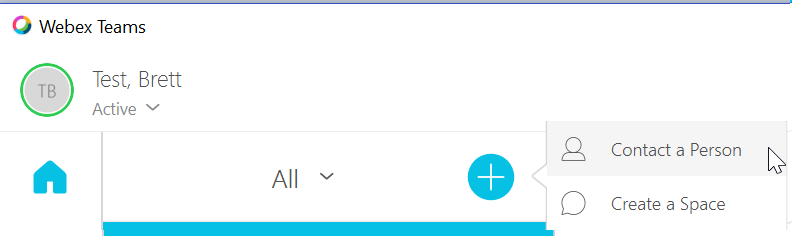
To begin an instant messaging conversation with someone, click the “+” symbol next to the All heading and then click Contact a Person.
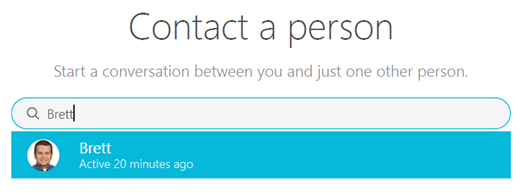
On the Contact a person window, enter the person’s first and/or last name you’d like to instant message. When the person is found, click their name.
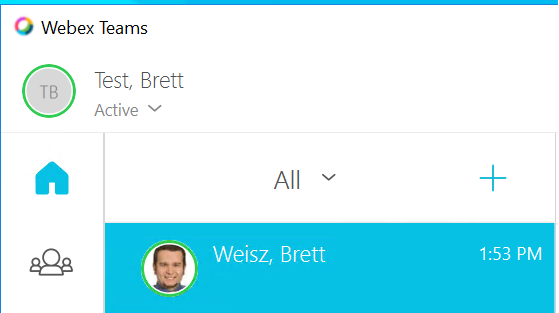
This will create a new chatroom between you and the person found in the search. The person will now be listed under the people section.
Click the person’s name and begin typing in the messaging area to send a message.
Room Based Messaging
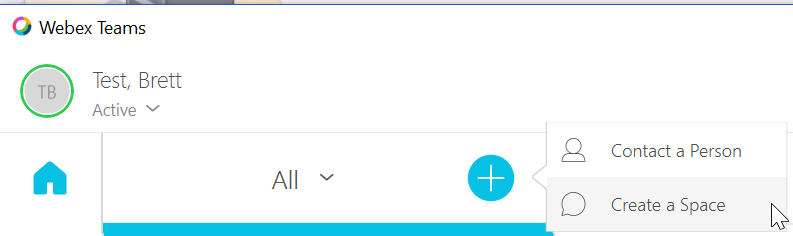
To create a chatroom that can be used by more multiple people, click the “+” symbol next to the All heading and then click Create a Space.
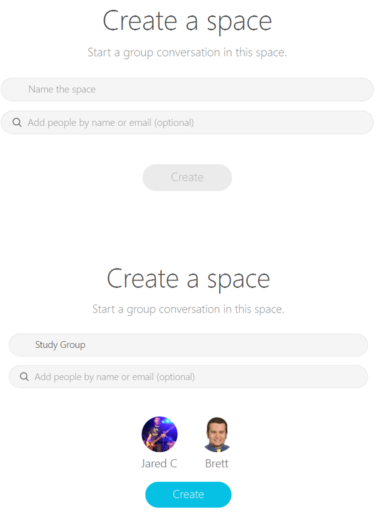
The Create a space area will appear allowing you to name your space as well as invite other people into the space. After naming the space and inviting people, click the Create button to create the space.
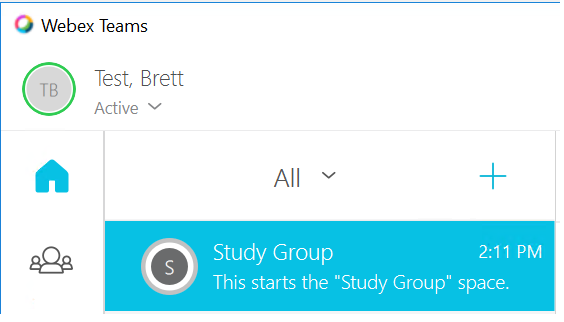
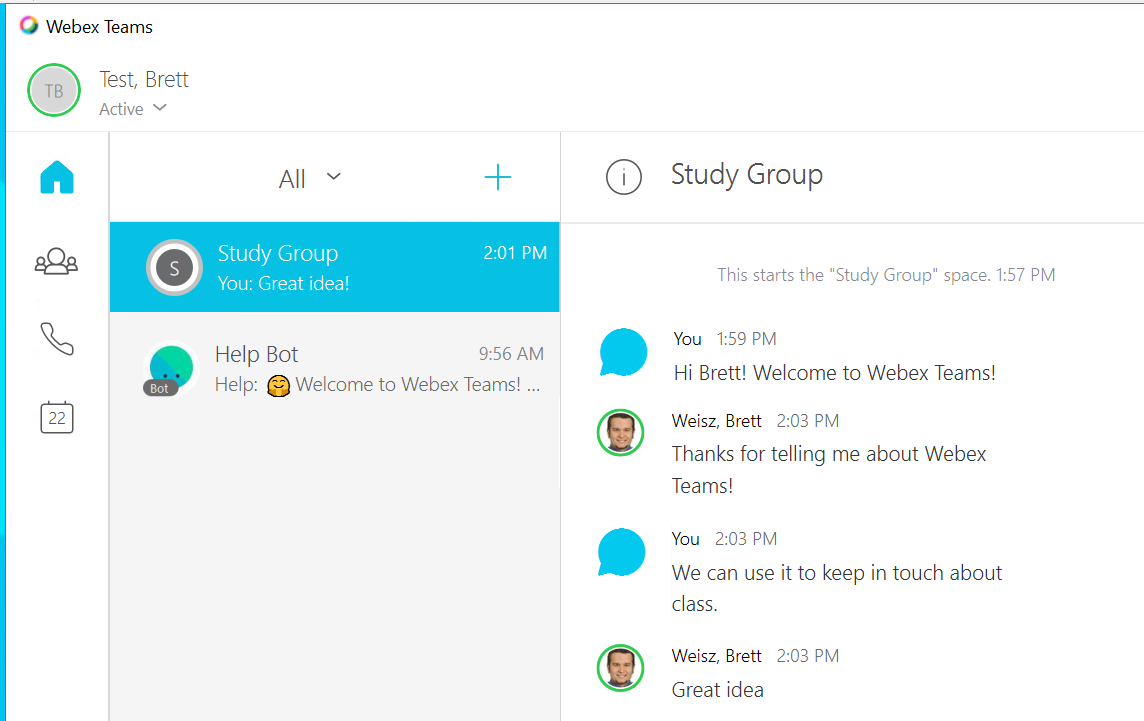
In this example, the Study Group space has now been created and placed in the Spaces section of Cisco Spark. The creator and the invited people can now share this space.
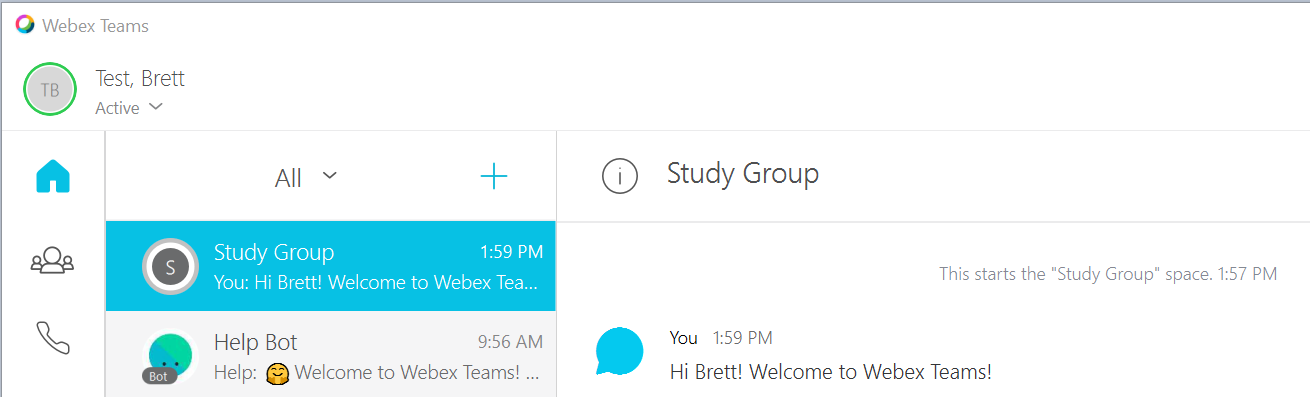
To send an instant message, click the person you’d like to chat with or the Space with multiple people, then click within the “Write a message to…” text box on the right side of the screen. After entering your message, click enter to send the message.

After clicking enter, the message is sent to the person or space’s chat window.
As messages go back and forth, they will be populated in the chat window.
A unique feature about Webex Teams instant messaging is that the messages are persistent meaning that when you close Webex Teams and open it at a later time, all of the messages from your previous conversations will still be available to review. This is also the same with chat within spaces.
If you no longer want to have a conversation or space, you can click the “i” symbol next to the user’s name or space name and click Leave space. Once everyone has left the conversation, it will be permanently deleted.

Teams
Teams help you keep spaces organized by categorizing multiple spaces under a common theme. Teams are great for a consistent group of people who are going to be working together for a long period of time. For example, you may have a team for a large project that includes cross-department team members all working together on specific pieces of the project.
To create a team:
- Click the Teams icon, click the + New Team button, name the team, and click Create.
- To add people, click Team Members, and Add Team Member. Then, type a name or email address and select the person.
- To create more spaces, click the Spaces tab within the team, click New Space, and enter a space name.
File Sharing
To add a file to the conversation or space, click the paperclip symbol above the chat text box and then browse and select your file. Click Enter to enter the file into the chat window.

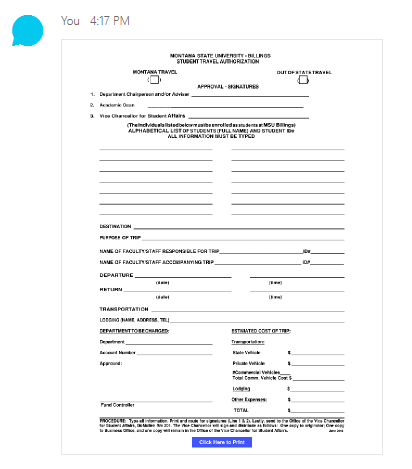
Alternatively, you can click and drag the file into the chat window to add it to the conversation. The file will show up within the chat room. The example below is a PDF document.
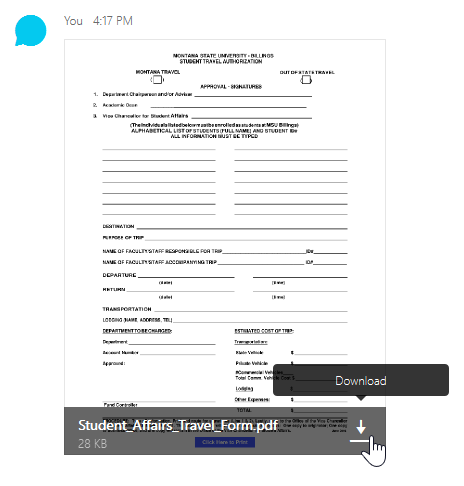
You can click the document to bring up a full size preview of the document. You can also click the down arrow icon to download the file.
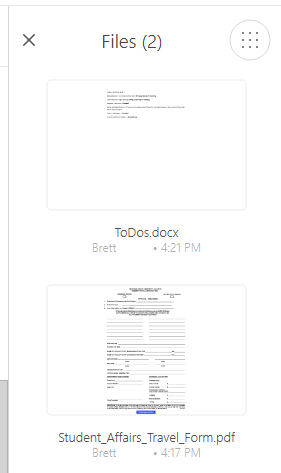
To see a summary of all the files uploaded to the conversation or space, click the Activity menu button within the space and then click the Files button.

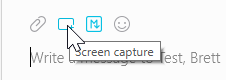
Clicking the Screen capture icon will allow you to click and drag to capture an image of your computer’s screen and paste it into the chat.
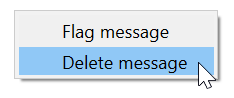
To delete a file from the conversation or space, right click the file and click Delete message.

Video Calls
From within the messaging session, you can also start a video call. To begin a video call:
- From within the messaging window, click the Activities button.
- Click the Call icon.
- Select your camera (the My Computer option will be your computer’s default camera).
- Click the Call icon.
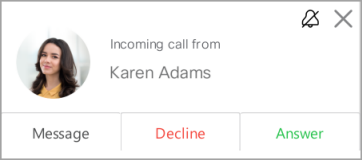
- The recipient will receive a notification of the video call request. Click answer to start the video call.
Note :This is for video calling only. This dialer cannot be used to call a telephone number.
Whiteboarding
Whiteboarding is the capability that allows both the Webex Teams app and the Cisco Webex Board users to view and cooperatively draw or annotate on their screens together. This will allow users who have a touch screen device (laptop, tablet, phone, ect) to draw on the screen while others with non-touch devices can use the mouse.
To start a whiteboarding session:
- From within the messaging window, click the Activities button.
- Click the Whiteboard icon.
- Click + New whiteboard.
- Important: Each side of the conversation will need to open the whiteboard app to see the drawing in real time.
- Begin drawing on the screen. Two people can draw simultaneously.
- If a screen shot of the drawing is desired, click the Post snapshot button. This will add a snapshot of the drawing into the chat window. Click enter to send the image to the room.
- Others in the conversation can then open the snapshot to view it, download it, or they can click the pencil icon to edit it.
![]()
To delete a whiteboard image, right click the image and click delete message. Notice: you’ll only be able to delete whiteboards you’ve posted. You will be unable to delete a whiteboard someone else has sent.
Meetings
Webex Teams has the ability to read your Outlook calendar and display your up coming meetings. By clicking the Meetings icon on the navigation menu, you'll be able to quickly assess your available for the day or week.
Additionally, Webex Teams has the ability to create ah-hoc meetings with everyone in a space (this is not available via person to person messaging, but only in Team spaces.) To create an ad-hoc meeting:
- From within your team space, click the Activity Menu button.
- Click the Meetings button.
- On the Schedule a Meeting window, click the Create Meeting Invite button to open an Outlook calendar invitation that can be sent to others.
- Copy and paste the "Join by video system" link into the dial on the navigation menu. Then click the call button.
Alternatively, you can copy and paste the Meeting Link into a web browser to start the meeting. After the address is entered, Spark will open and begin connecting to the meeting.
Joining a Webex Meeting from Webex Teams
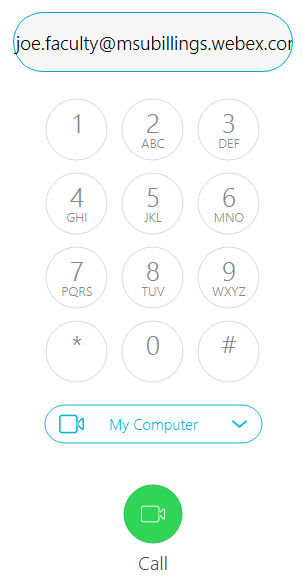
Similarly to joining a Webex Teams meeting, you can join a Webex meeting via Webex Teams:
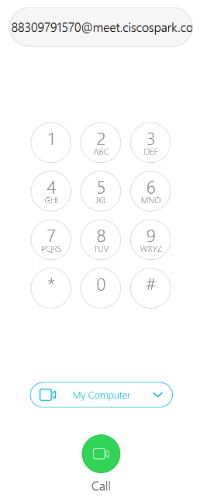
- From within Webex Teams click the Call icon.
- In the Dial text box, enter the SIP or URL of the Webex meeting (Ex: joe.faculty@msubillings.webex.com). This information can be found on the Meeting Info tab of the WebEx meeting.
- Click the Call icon.
Search
Clicking the magnify glass icon on the top right corner of the screen allows you to search your conversations, spaces, and files for what you looking for.
Application Updates
When you see that green arrow icon, you'll know that you have an updated version of Webex Teams waiting for you. Click the green arrow to restart your app and start the upgrade process. The apps on your phone will upgrade just as any other app update through your phones respective app store.
![]()
| Home |