Document Tagging in Depth
The tagging process in DocuSign provides a lot of different options when setting up a document. The process of tagging a document includes click and dragging a tag it to the location on the document where you want the information displayed. Release the mouse when you get the tag to the desired location on the document. The tag can be repositioned by clicking and dragging it again or by selecting it and using the arrow keys on your keyboard.
Tags are located on the left hand side of the document screen.
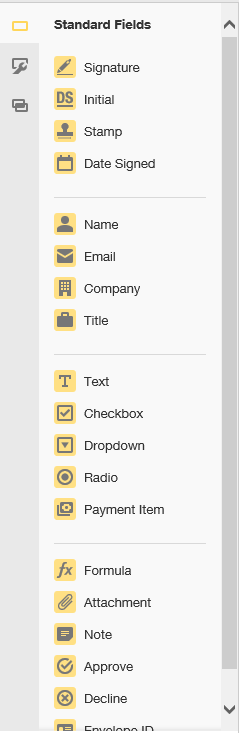
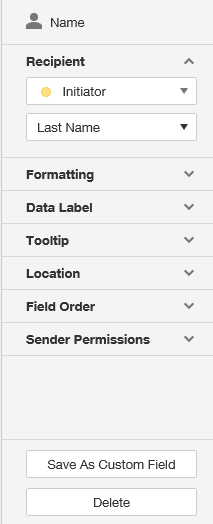
Clicking on a tag displays its properties on the right hand side of the screen. Each heading can be expanded showing the configuration options for that tag. Examples of configuration options include font, font size and color, tool tips, and order.
Tag Alignment
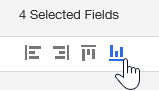
Tags can be aligned. It's much easier to use the alignment tool than it is to try to drag and drop multiple tags into alignment. To align fields, click and drag your mouse over the area that encompasses the tags you want to align. This will select the tags. Next, click one of the four alignment buttons on the right hand side of the screen.
Selecting the tags:

Click an alignment button:
Parsing Tags
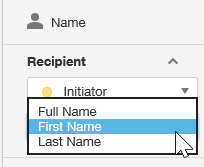
Some fields can be parsed from their enter information such as the Name tag. The Name tag pulls in the recipients name from the Recipients section of the envelope. In some situations, you may only want a first name or last name. In this case, place the name field on the document and then in the properties window select the portion of the name you want.
Data Labels
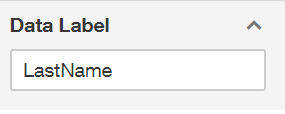
Data labels help to document what a particular tag's content contains. A report of the data in a forum can be exported and having a data label can significantly help decipher which field the data belongs. In the property window of a tag you'll see a data label property.
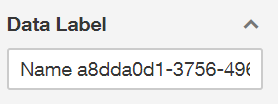
Updating the label to a value that corresponds to the data entered into it will be helpful when exporting the data.
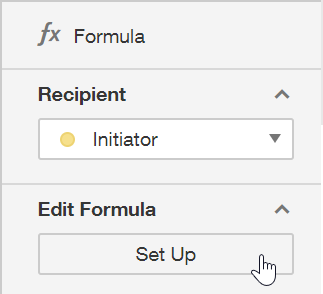
Calculated Fields
Calculations can be performed on the values of certain tags when using the Formula tag.
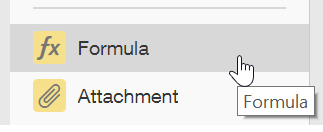
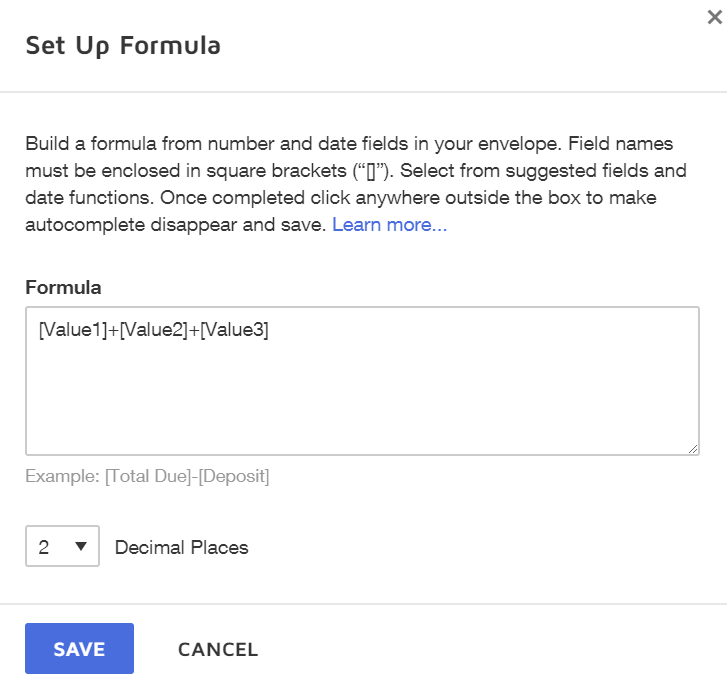
After placing the Formula tag on your document, click the Setup button in the property window.
Clicking within the Formula text box displays fields that can be selected for calculations. This is another reason why Data Labels are important (see above).

After configuring your calculation, click the Save button.
Conditional Based Fields
Fields can be displayed or hidden based on certain conditions. To learn about conditional based fields visit the DocuSign help site here.
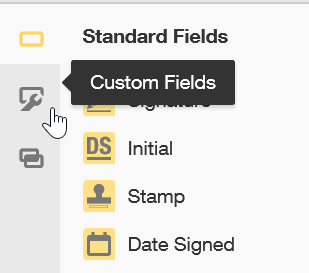
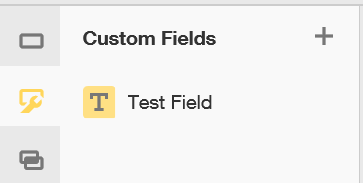
Custom Fields
If you use a common field across multiple forms, a custom field can be created so that it's configuration can be used repeatedly. The Custom Fields icon is located next to the Standard Fields heading.
To create a custom field click the + symbol next to the Custom Fields heading.
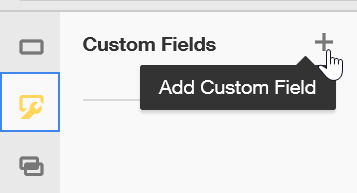
After filling out the field information, click the Save button at the bottom of the screen. The new custom field will now show up below the Custom Fields heading for use in your forms.
Adding Active Links
To add an active link to a form:
1) Click the Custom Fields button.
2) Click the + button.
3) Name the field #HREF_DESCRIPTION where description describes the link. (Example: #HREF_HomePage).
4) Leave the Type as Text and enter the text you want to display on the form in the Initial Value field. (Example: MSUB Homepage).
5) Format the text with a font/color/size to make it stand out as a link.
6) Under the Default Advanced heading enter the URL into the Tooltip field.
7) Drag the new Custom Field onto the form.

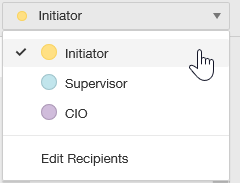
Tags for each Recipient
Each recipient on the envelope has their own set of tags. Switch between them is down by clicking the drop down box on the top left corner of the screen. When switching between recipients, the color of the tags change to the corresponding color of the recipient. This lets you know when recipient you're working with and what tags they'll be responsible for filling in. The color for each recipient is not customizable.