Creating Quizzes and Exams
Overview
Creating a quiz, or exam, in D2L is simple enough to do; however, doing so from scratch can be time consuming if you are creating one question at a time. Your textbook publisher will likely have course packages containing test banks that can be imported directly into D2L. There are also test generator software programs out there such as TestGen and ExamView. Further, the eLearning department will convert your testbanks into D2L format using Respondus. Small quiz or large exam from scratch, below are the steps to create a quiz (exam) in D2L.
Step-by-Step
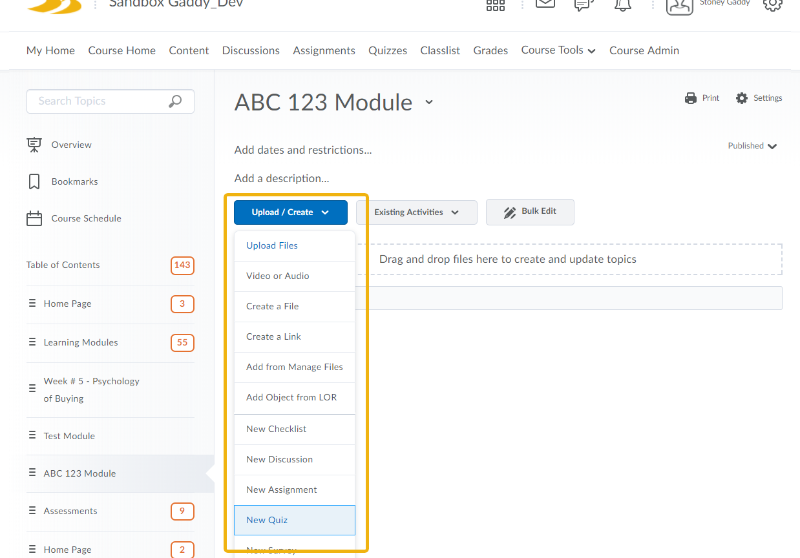
- Access the content module where you want to create the quiz. If you are not using modules, you can click on the Quizzes link at the top of the D2L page to start the quiz creation process.
2. Click the Upload / Create drop-down button and select New Quiz.
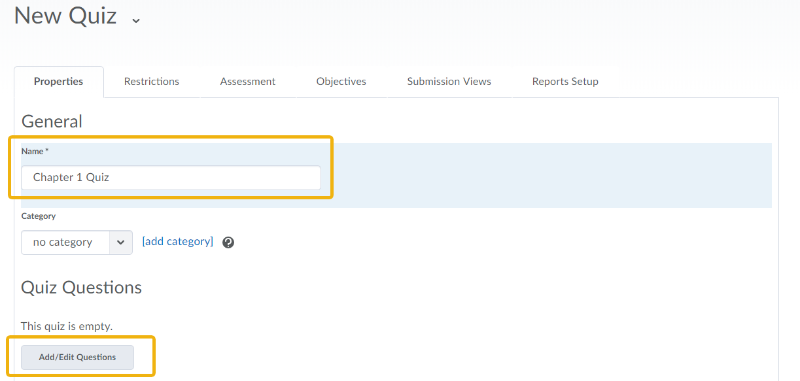
3.In the Properties tab, give your quiz a Name: and then click Add/Edit Questions.
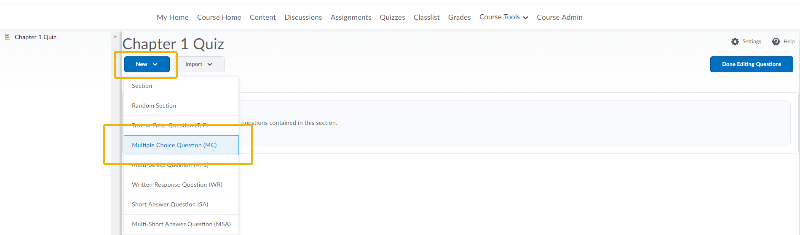
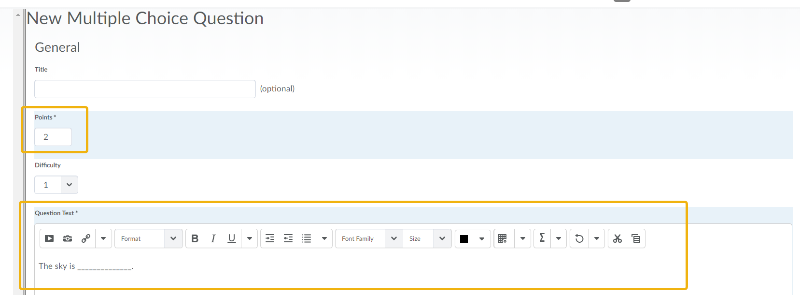
4. Once in the Quiz window, click New and then select the question type (Multiple Choice in the example below).
5. Set the point value for the question and then enter your question text.
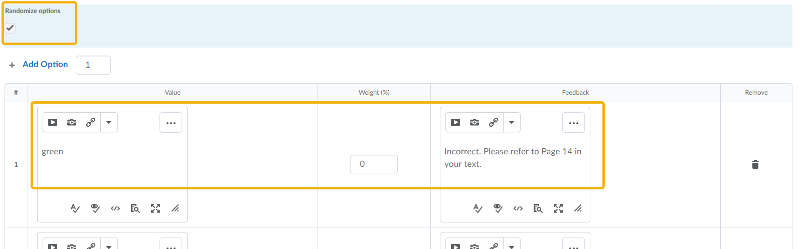
6. I've selected Randomize options and then start entering option text and feedback if you'd like. Once again, this is a multiple choice example.
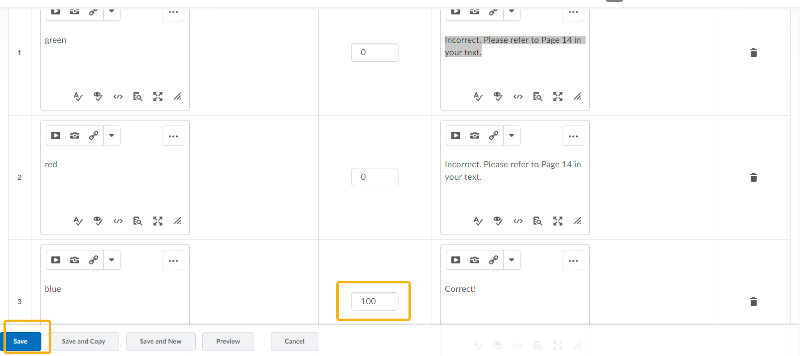
7. Enter the remaining options. Make sure you identify the correct option with a 100 as D2L is looking for a % correct. For multiple correct answers, you'd simply do the math. For example if there are two correct answers, each would be worth 50(%). The exact behavior of the scoring depends on the type of question.
8. When done with the question, click Save at bottom.
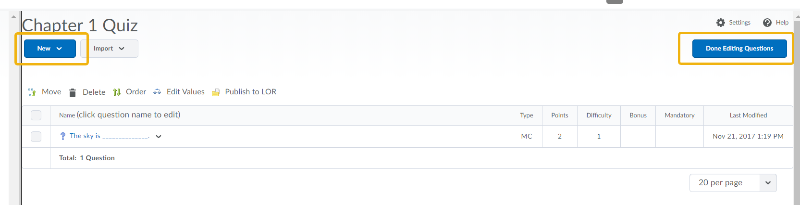
9. To add another question, click the New button and keep going. When done, click Done Editing Quesions.
10. Make additional selections and choose your preferred settings such as Shuffle order of questions.
NOTE: There are a number of options as you scroll through the Properties tab. This tutorial will focus on a handful of options. Please look over all possibilities that give you control over how your assignments are conducted in D2L.
11. Enter a description / introduction for students to see.

12. When done setting the parameters in the Properties tab, click Save at bottom. Don't click Save and Close just yet. There are two more tabs we need to visit.
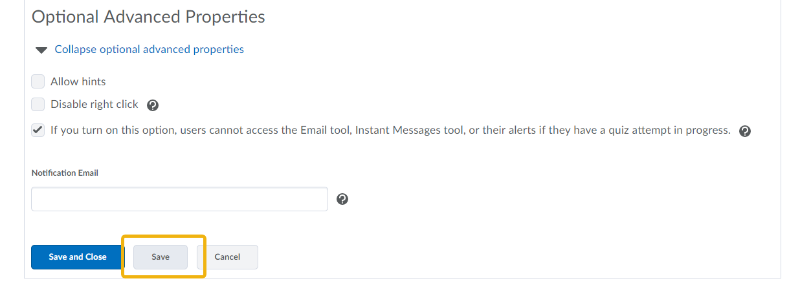
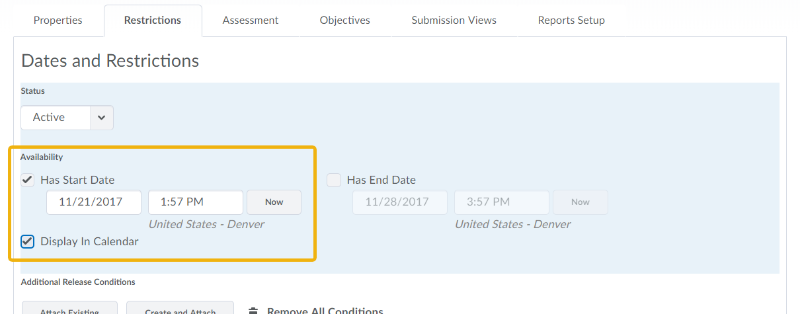
13. Click the Restrictions tab toward the top of the page.
14. Change the Status to Active and adjust the Availability to have a Start Date. You can set an End Date as well.
15. Check the Display in Calendar option.
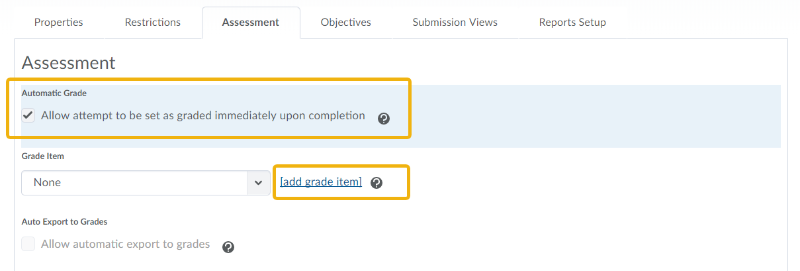
16. Click the Save button at bottom and then go to the Assessment tab.
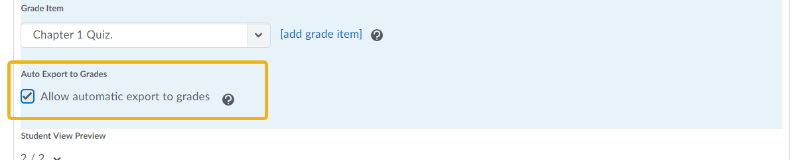
17. To add the quiz to the D2L grade book, click the Allow attempt to be set at graded... checkbox and then click the [add grade item] link.
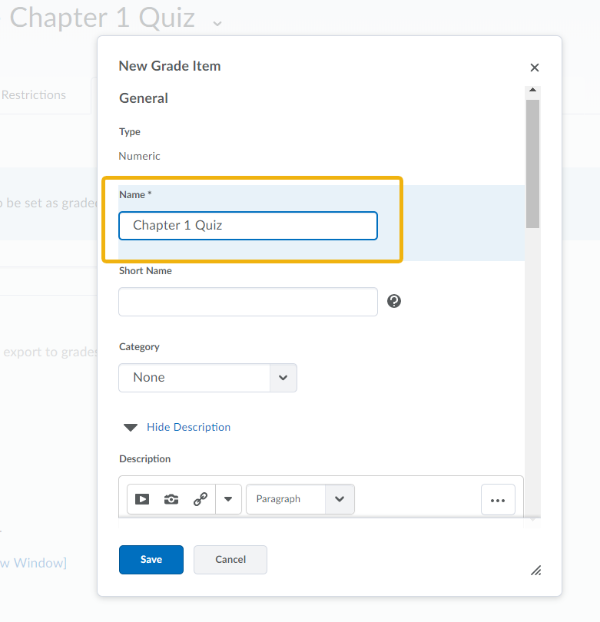
18. Give the quiz grade item a name. It is recommended names for the gradebook mirrow the quiz name.
19. Make any other adjustments and then click the Save button.
20. Once back to the Assessment tab, select the Allow automatic export to grades check box.
NOTE: There are a number of options as you scroll through the Assessment tab. This tutorial will focus on a handful of options. Please look over all possibilities that give you control over how your assignments are conducted in D2L.
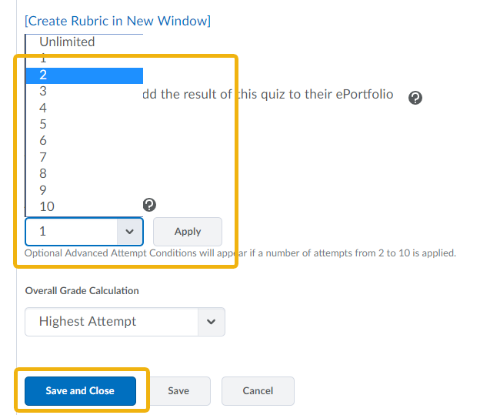
21. Identify the maximum number of attempts and click the Apply button.
22. When done, click Save and Close.
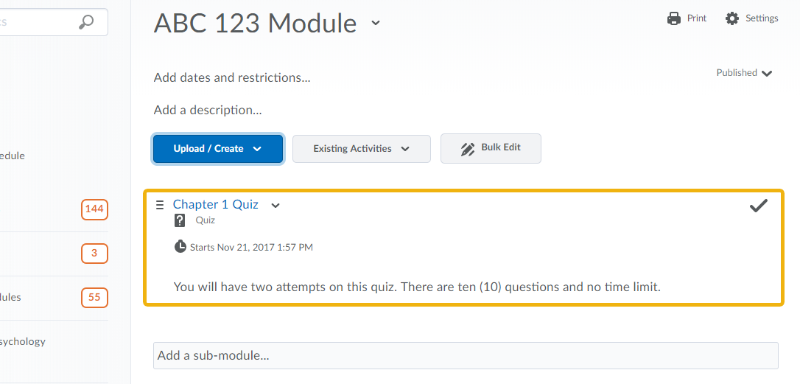
Your quiz is now located in the module for students to see and complete!