Creating Discussions
Overview
The Discussions tool is a collaboration area where you and students can post, read and reply to messages on varying topics you create.
With the D2L Discussion tool, it is important to note there are 3 main areas: Forums, Topics, and Threads. Forums are the top level that are used for organizing discussion topics. Topics live under Forums and are a place for conversations centered around a specific talking point or assignment. Within a Topic, students will create their own Threads. Threads are where the actual conversation takes place between the class.
Step-by-Step
- In your course in D2L, access the content module in which you want to create your discussion forum. You can also click the Discussions link on the navigation bar toward the top of the page.
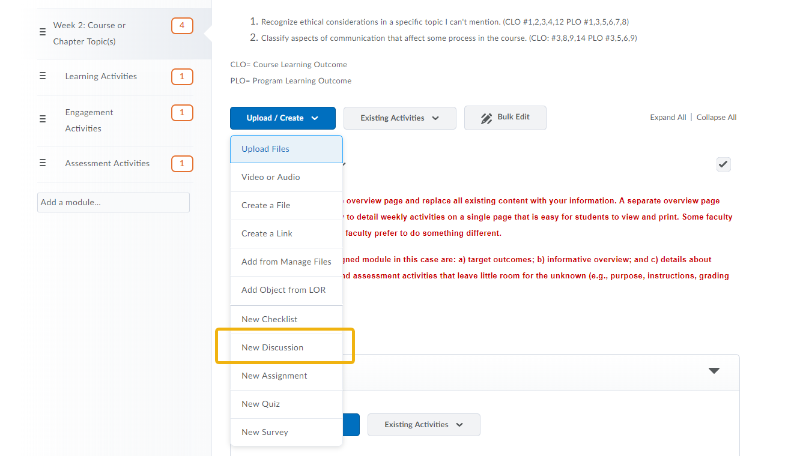
2. In your content module, click Upload/Create and then New Discussion.
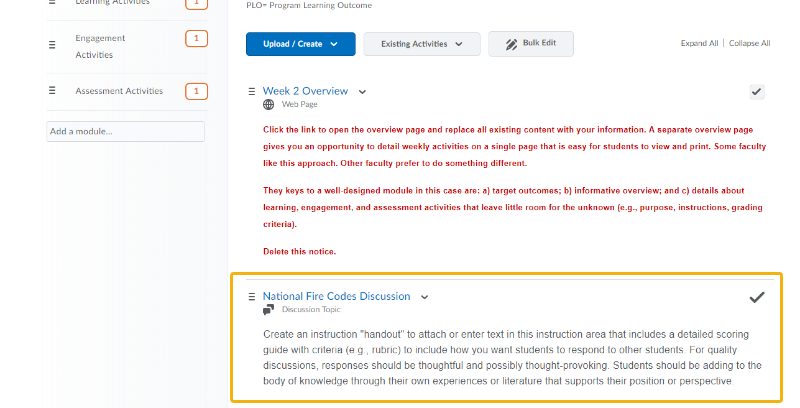
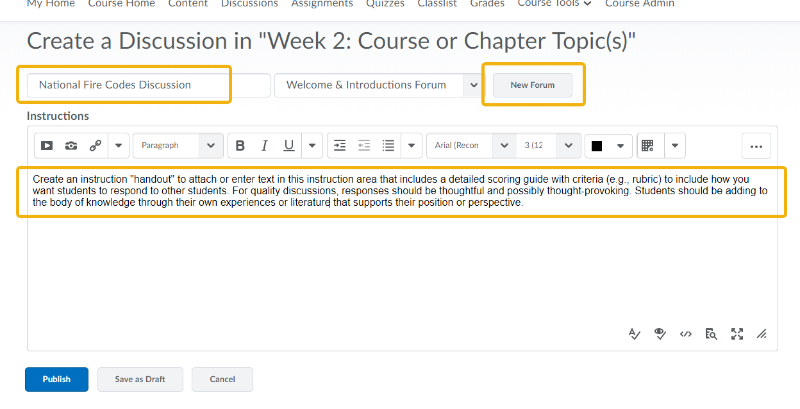
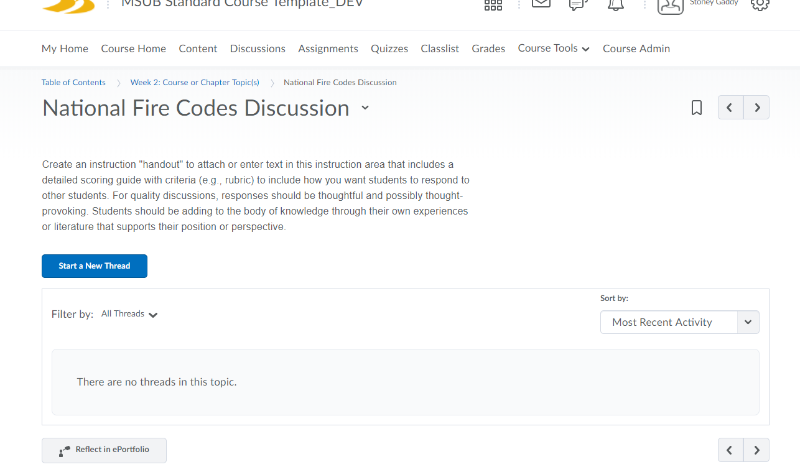
3. Enter a title for your discussion topic.
4. Enter the instructions into the text area or attach a "handout" of the instructions.
5. You'll need to attach the discussion topic to a Forum. Click the New Forum button.
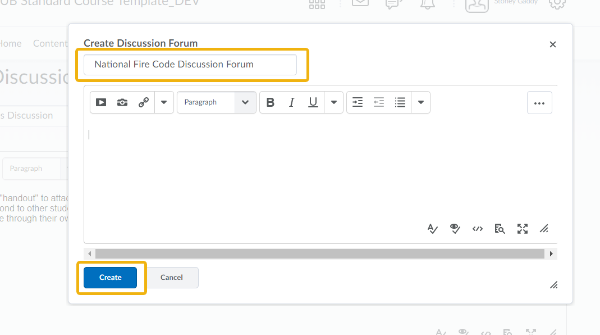
6. Enter a Forum title. The forum title should align with, if not mirror, the discussion topic title.
7. Click Create.
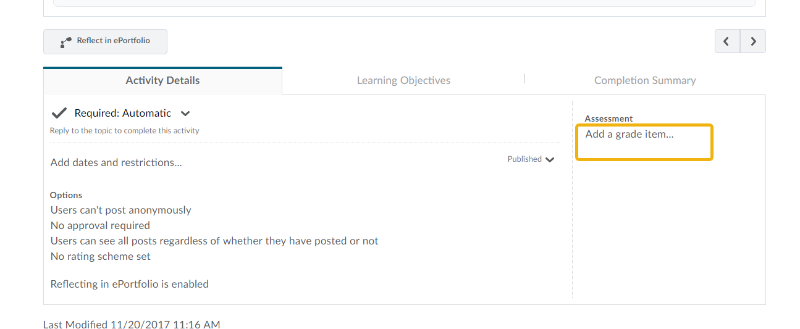
Your discussion topic has now been created. Next, we'll look at Options and associate the discussion with Grade.
8. In the Activity Details tab, you can adjust dates, restrictions, and other options. We'll leave the default settings for these. On the right side of the tab, click the Add a grade item... text.
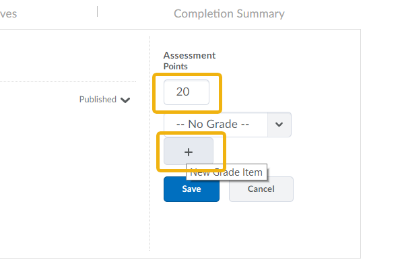
9. Enter the point value for the discussion activity.
10. Click the + (New Grade Item) button.
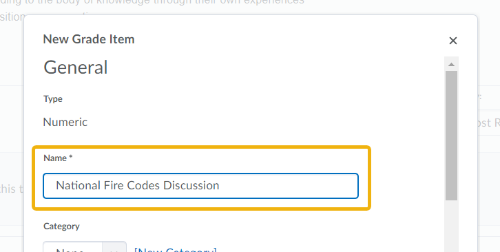
11. Enter a Grade Item Name that mirrors the discussion title itself. This will make it easy for students to connect the two when looking at grades.
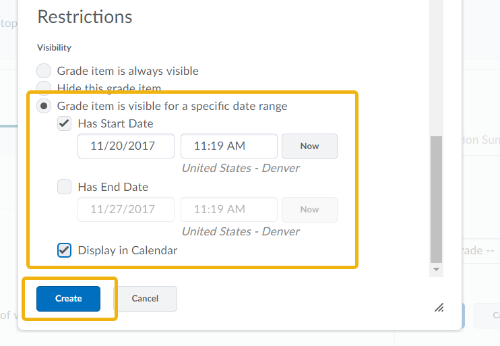
12. Scroll through the remaining grade item options. Make adjustments as necessary. Below, I selected the Grade item is visible... option, identified a start date, and checked the Display in Calendar option.
Having your assignments, discussions, and quizzes display in the Calendar can be very beneficial to busy students.
13. Click the Create button.
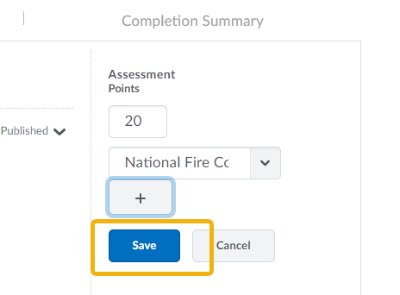
14. IMPORTANT! Be sure to click Save once you return to the Activity Details area. This can be easy to overlook and move on. Not clicking Save here will cancel adding the activity to Grades.
Your discussion activity is now ready for student participation and subsequent grading.