Creating an Assignment
Overview
Do you want a single, convenient place where students can turn in their assignments? In D2L, assignment submission folders not only collect students’ assignments, but also let you read, grade, and provide feedback. Even though these folders are technically called Assignment Submission Folders, they are more often called either Assignment Folders or Submission Folders. In this tutorial, we will be calling the folders Assignment Folders.
NOTE: By default, assignments submission folders are hidden. Your students will not be able to see the folder until you allow it to be seen. Please see the Restrictions Tab section.
Step-by-Step
- Inside your D2L course, click on the Assignments tab near the top of the page.

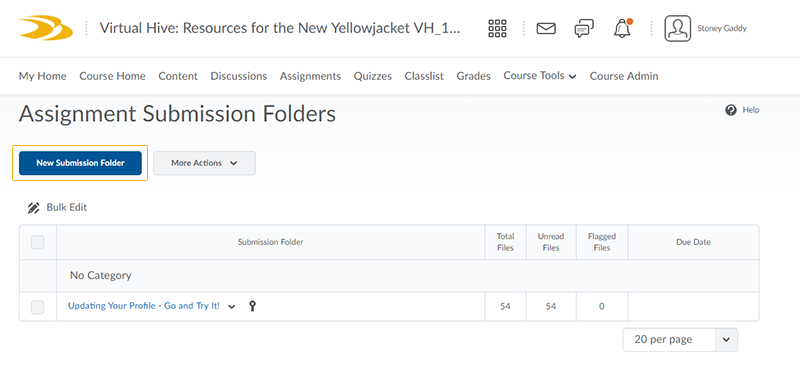
2. On the Assignment Submission Folders page, click on the New Submission Folder button.
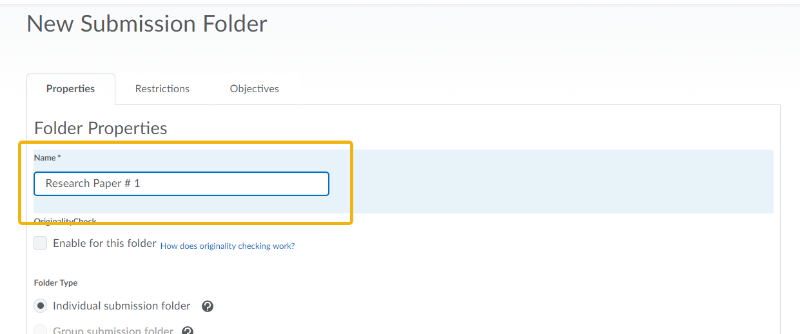
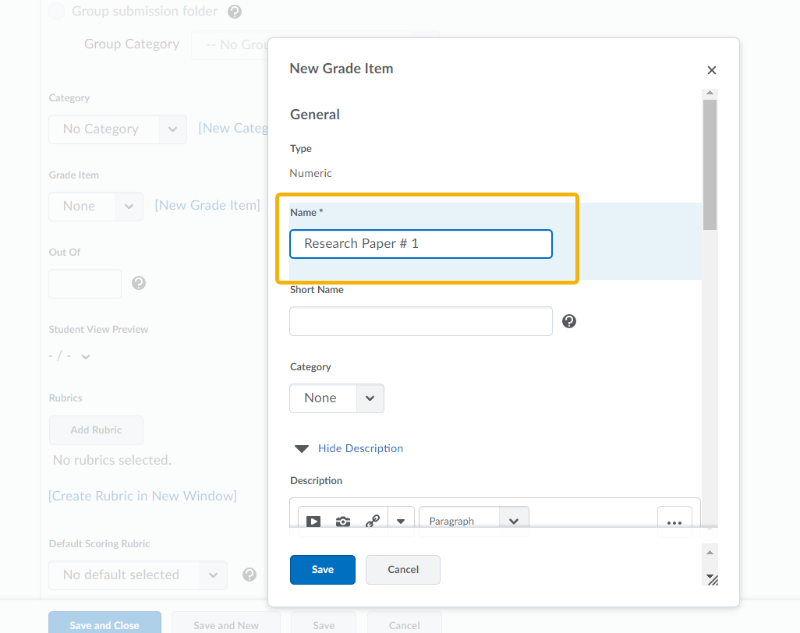
3. Give your assignment a Name:
NOTE: There are a number of options as you scroll through the New Submission Folder page.
This tutorial will focus on a handful of options. Please
look over all possibilities that give you control over how your assignments
are conducted in D2L.
4. Chances are, you want the assignment to be associated with the D2L grade book. If so, please follow steps 5-7; otherwise, skip ahead to step 8. Click the New Grade Item link.
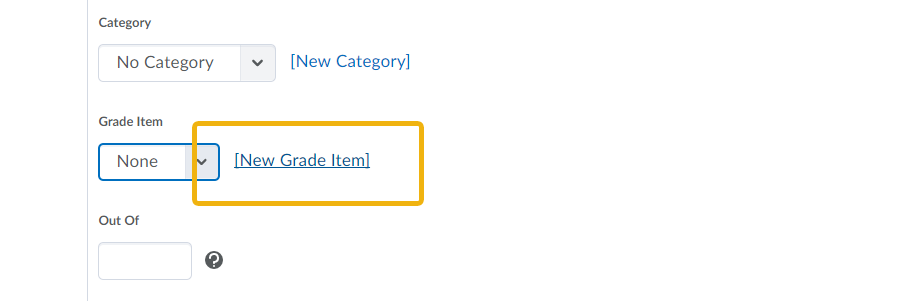
5. On the New Grade Item pop-up window, enter the Name: of the assignment as you want it to appear in the grade book. To be consistent, you will likely want the name to be the same as in the assignment folder.
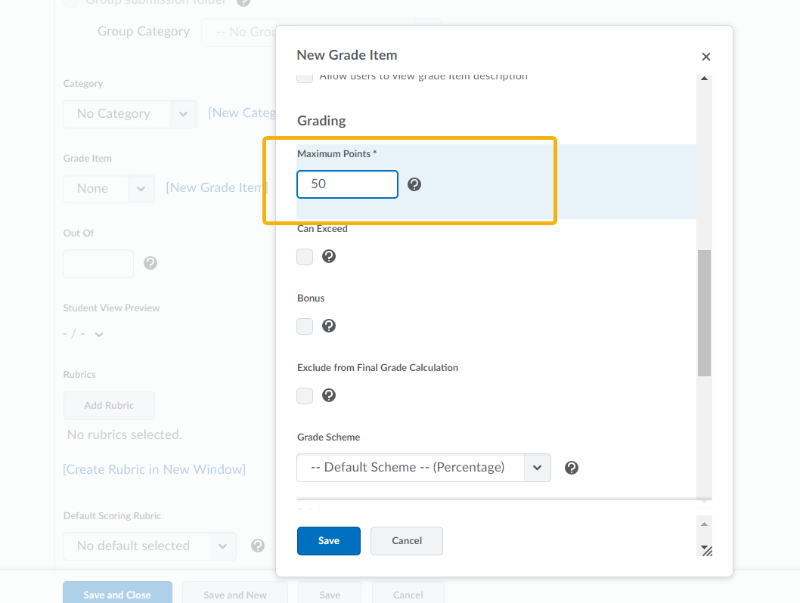
6. In the Grading section, identify the Maximum Points possible for the assignment.
7. Scroll through the remaining options and then click Save.
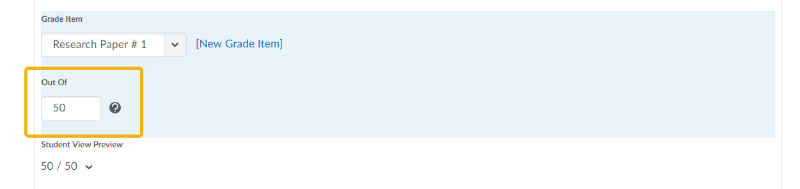
8. Enter the number of points possible in the Out Of text box. If you associated this assignment with the grade book (steps 5-7), you'll want to make sure the points possible match.
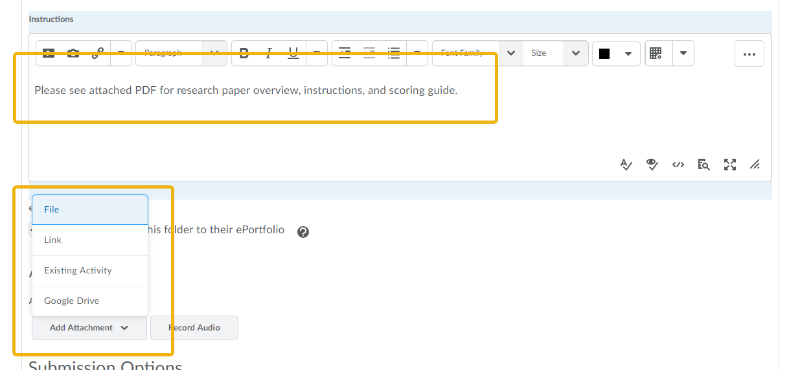
9. We'll now provide some text in the Instructions text box.
10. In this example, I have a PDF document with instructions and a scoring guide (rubric) I want to attach. Click the Add Attachment button and select File.
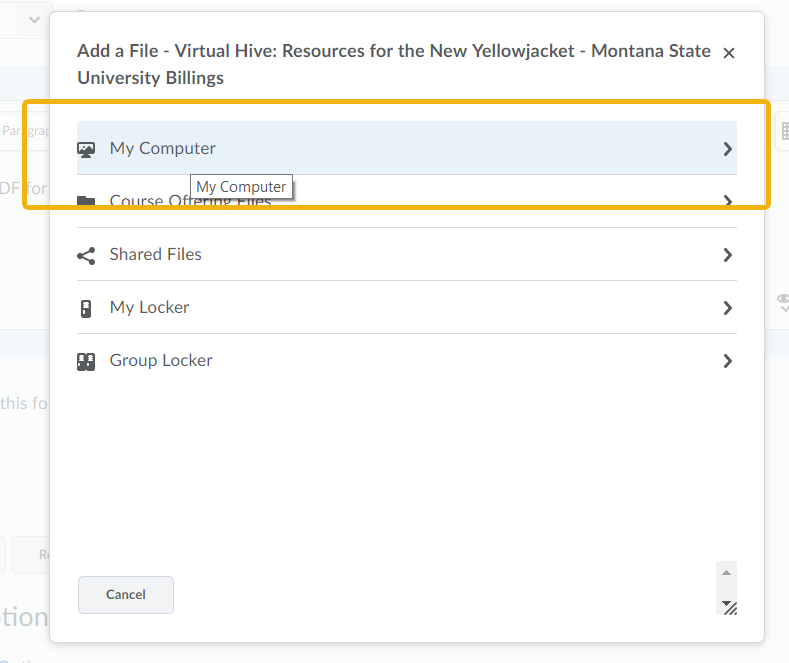
11. You'll start by clicking My Computer on the Add a File pop-up window. Follow the process until you've uploaded and attached your assignment file.
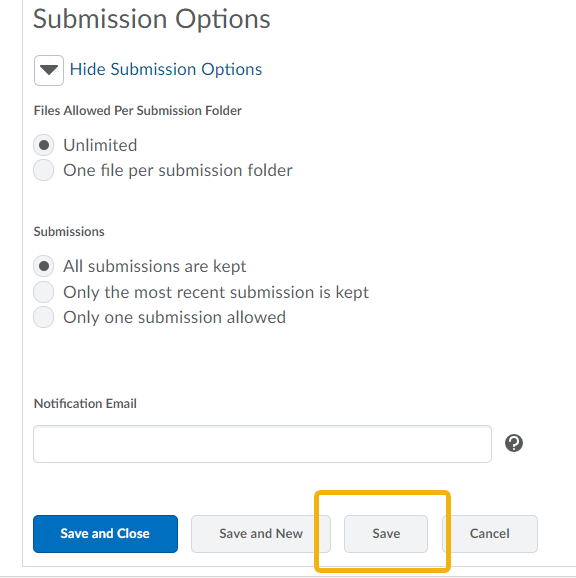
12. Once you return to the Edit Submission Folder screen after attaching your file, scroll to the bottom of the page and click Save. We don't want to close just yet.
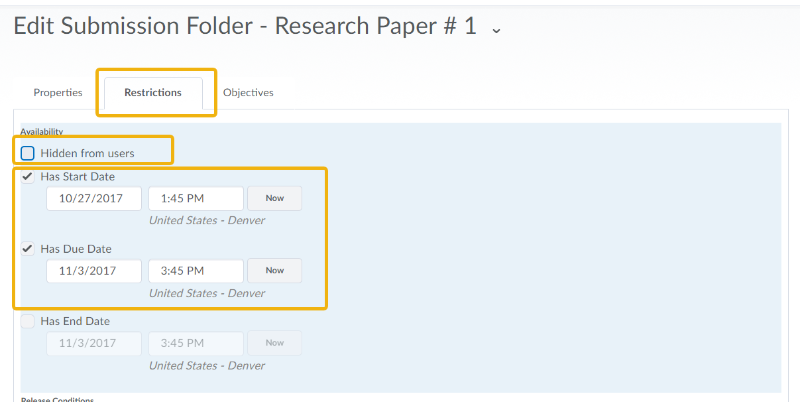
13. Next, let's click the Restrictions tab at the top of the page.
14. Uncheck Hidden from users so students can access the assignment.
15. Next, you can select a Start Date and, more importantly, a Due Date and time so students know exactly when the assignment is due.
16. When done, click the Save and Close button at the bottom of the page.
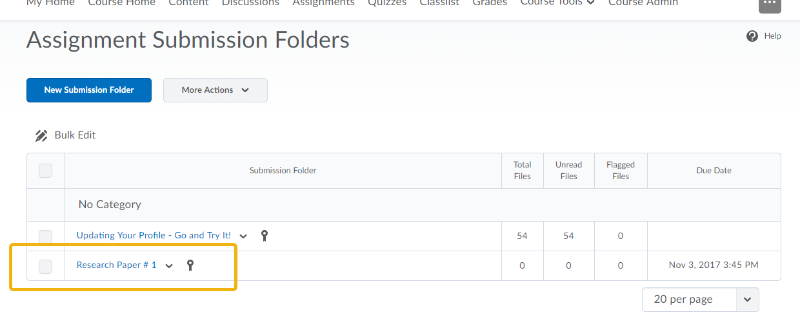
Congratulations! You have created an assignment folder!
Your assignment will appear in the Assignments page as shown below:
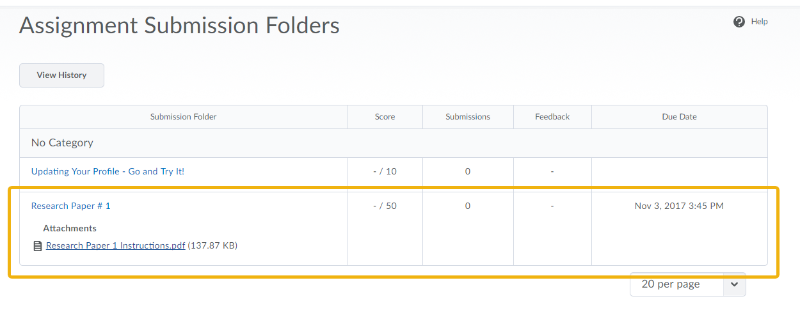
Students will see the assignment as shown below: